Samsung dishwasher repair knowledge can save you both time and money when your appliance starts to malfunction, which can be a frustrating experience. Understanding how to troubleshoot and fix common issues is the first step toward resolution. This guide will provide you with a comprehensive overview of the necessary steps to diagnose and repair problems that may arise with your dishwasher.
By following this step-by-step guide, homeowners can gain the confidence needed to tackle repairs themselves. From simple clogs to more complex electrical problems, each section will offer clear instructions on how to address the issue effectively. Before calling in a professional, it’s essential to identify whether the problem can be fixed with some basic DIY skills.
Maintaining your Samsung dishwasher is equally important to ensure its longevity and efficiency. Regular cleaning and minor repairs can prevent significant breakdowns and costly repairs in the future. This guide will not only help you fix current issues but will also equip you with knowledge to care for your appliance properly.

Samsung Dishwasher Repair: Step-by-Step Guide for Homeowners
Repairing a Samsung dishwasher can seem daunting, but with the right approach, homeowners can tackle common issues effectively. This guide outlines the necessary steps to identify and fix standard malfunctions, enhancing your appliance’s performance and longevity.
Step 1: Identify the Problem
Begin by determining the specific issue with your dishwasher. Common problems include the appliance not starting, poor cleaning performance, strange noises, or leaks. Listen for unusual sounds and check for error codes on the display, which can provide insight into the malfunction.
Step 2: Basic Troubleshooting
If your dishwasher won’t start, ensure it is plugged in and the circuit breaker is functional. Check for a door that isn’t closed properly, as most models won’t operate if the latch is not secure. For cleaning issues, inspect and clean the spray arms and filters for food debris that may obstruct water flow. If water is not draining, check the drain hose for kinks and ensure the garbage disposal is clear.
In cases of leaks, examine the door seal and the water inlet valve for damage. Replace any worn or damaged components to prevent further issues. Always disconnect the power before attempting any repairs to avoid electric shock.
Once you’ve identified and resolved the issue, test the dishwasher to ensure it operates correctly. Regular maintenance, including cleaning the filters and inspecting seals, can greatly extend the lifespan of your Samsung dishwasher.
Identifying Common Dishwasher Problems
Understanding the common issues that can arise with your Samsung dishwasher is essential for effective troubleshooting and repair. Below are some frequent problems you might encounter.
1. Dishwasher Won’t Start
If your dishwasher fails to start, check the power supply first. Ensure that the unit is plugged in and that the circuit breaker is not tripped. Additionally, inspect the door latch; if the door is not securely closed, the dishwasher may not operate. Faulty control panels or malfunctioning door switches can also prevent the dishwasher from starting.
2. Dishes Not Cleaning Properly
If your dishes come out dirty or not fully cleaned, several factors may be at play. Verify that the spray arms are not clogged and can rotate freely. Ensure that you’re using the correct dishwasher detergent and that it is stored properly. Additionally, loading dishes incorrectly can obstruct water flow; arrange items so that water can reach all surfaces. Inspect the filter for food debris and clean it regularly to maintain optimal performance.
Gathering Necessary Tools for Repair
Before embarking on the repair of your Samsung dishwasher, it is essential to collect the necessary tools to ensure a smooth process. Having the right equipment at your disposal can save time and prevent potential frustrations during the troubleshooting and repair stages.
Here is a comprehensive list of tools you may need:
1. Screwdrivers: A set of both flathead and Phillips screwdrivers is crucial. These will help you remove and secure various components of the dishwasher, including access panels and securing screws.
2. Pliers: A pair of both needle-nose and standard pliers will be useful for gripping and bending wires or other small parts that may be hard to reach with fingers.
3. Wrench Set: A socket wrench set can assist in loosening and tightening nuts and bolts. Ensure you have both metric and standard sizes, as dishwashers may have components secured with either type.
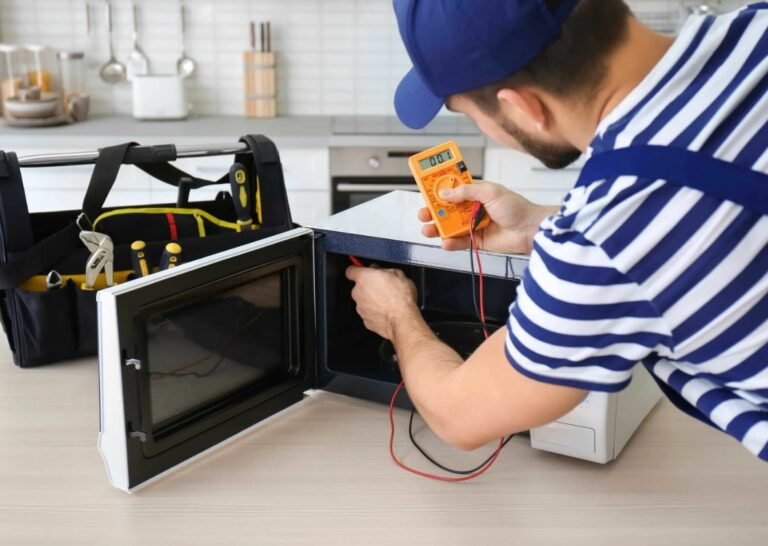
4. Multimeter: This tool is essential for electrical troubleshooting. Use it to test for continuity and measure voltage in various electrical components, ensuring they function correctly.
5. Towels and Buckets: Keep towels and a bucket handy to catch any water that may leak during disassembly. This can help maintain a clean working area and prevent water damage to your floor.
6. Flashlight: A good flashlight is important for illuminating dark spaces within the dishwasher, allowing you to see and access issues that are not easily visible.
7. Replacement Parts: Depending on the issue at hand, you might need specific replacement parts such as seals, hoses, or filters. Having these on hand can expedite the repair process.
After gathering these tools, you will be well-equipped to tackle any repair issues your Samsung dishwasher may present. Always ensure that you handle all components carefully and follow safety precautions, especially when working with electrical parts.
Checking Power Supply and Circuit Breakers
Before attempting any repairs on your Samsung dishwasher, it is crucial to ensure that it is receiving power and that there are no issues with the electrical supply. Follow these steps to check the power supply and circuit breakers effectively:
First, confirm that the dishwasher is properly plugged into the electrical outlet. Inspect the power cord for any visible damage or wear. If you find any issues, it may be necessary to replace the power cord to restore functionality.
Next, locate the circuit breaker panel in your home. This panel is typically found in the basement, garage, or utility room. Open the panel and identify the breaker that corresponds to the dishwasher. It may be labeled, but if it is not, it is usually a dedicated breaker located near other kitchen appliances.
Check the status of the circuit breaker:
| Status | Action |
|---|---|
| ON | Breaker is functioning correctly. Check other causes of malfunction. |
| OFF | Switch the breaker back to the «ON» position and test the dishwasher. |
| Tripped | Reset the breaker by turning it completely off and then back on. Test the dishwasher. |
If the circuit breaker continues to trip, there may be an underlying electrical problem that requires professional assistance. Overloading the circuit, wiring issues, or appliance malfunction can cause frequent trips.
Finally, ensure that any GFCI (Ground Fault Circuit Interrupter) outlets in the area are also functioning properly. If your dishwasher is connected to a GFCI outlet, it can trip and cause power loss. Press the reset button on the outlet if necessary.
After these checks, if your Samsung dishwasher still does not operate, further troubleshooting or professional repair may be needed.

Inspecting Water Supply Issues
When your Samsung dishwasher fails to operate effectively, water supply issues may be the culprit. Proper inspection can help diagnose and resolve these problems quickly. Follow these steps to ensure your dishwasher receives the necessary water supply.
Check the Water Supply Line
The first step in identifying water supply issues is to check the water supply line. This line carries water from your home plumbing to the dishwasher. Perform the following checks:
- Ensure the Valve is Open: Locate the shutoff valve, usually found under the kitchen sink. Make sure it is fully opened.
- Inspect for Kinks: Examine the water supply line for any bends or kinks that could restrict water flow.
- Inspect for Leaks: Look for any visible leaks or water damage around the connection points.
Examine the Water Inlet Filter
The water inlet filter can often become clogged with debris, affecting water supply to the dishwasher. To inspect this component:
- Turn off the water supply to the dishwasher.
- Disconnect the water supply line from the back of the unit.
- Locate the inlet filter at the connection point.
- Carefully remove and clean the filter under running water to remove any buildup.
- Reinstall the filter, reconnect the water supply line, and turn the water back on.
By thoroughly inspecting both the water supply line and the inlet filter, you can often diagnose the source of water supply issues, leading to a more effective repair of your dishwasher.
Cleaning and Unclogging Spray Arms
Spray arms play a crucial role in the effective operation of your Samsung dishwasher. Over time, food particles, mineral deposits, and grease can clog the spray arms, leading to poor cleaning performance. Regular maintenance will ensure that your dishwasher operates efficiently. Here’s how to clean and unclog spray arms step by step.
First, ensure that the dishwasher is turned off and unplugged to eliminate any risk of electrical shock. Remove the lower dish rack to gain access to the spray arm. Depending on your model, the lower spray arm might be secured by a simple twist or a nut. Carefully detach it to avoid damaging any components.
Next, inspect the spray arm for visible obstructions such as food particles or debris. Use a soft brush or an old toothbrush to gently scrub the arm, focusing on the holes where water shoots out. This will help dislodge any buildup. For tougher clogs, soak the spray arm in a solution of warm water and vinegar for approximately 30 minutes to break down stubborn deposits.
Once you’ve cleaned the spray arm, rinse it thoroughly under warm running water to remove any remaining debris and vinegar. Before reattaching, inspect the spray arm for any damage. If it appears cracked or broken, consider replacing it to guarantee optimal performance.
After the spray arm is clean and dry, reinstall it by aligning it correctly and securing it in place. Replace the lower dish rack and make sure everything is seated properly. Before using your dishwasher, it’s a good idea to run a short cycle without dishes to ensure that the spray arm operates effectively.
Regular cleaning of the spray arms should be part of your maintenance routine. Performing this simple task every few months will help maintain the efficiency of your dishwasher and improve its longevity.
Testing and Replacing the Door Latch Assembly
The door latch assembly in your Samsung dishwasher is a critical component that ensures the door closes properly during operation. If the door does not latch securely, it can lead to water leaks and ineffective cleaning. Testing and replacing the door latch assembly is a straightforward process that can be done using basic tools.
Testing the Door Latch Assembly
Before replacing the door latch assembly, it is essential to test its functionality. Start by unplugging your dishwasher from the power source for safety. Open the dishwasher door and visually inspect the latch for any obvious signs of damage or wear. Close the door slowly and listen for any clicking sound, indicating that the latch is engaging properly.
Next, use a multimeter to check the continuity of the latch switch. Locate the connector leading to the latch assembly, detach it, and set your multimeter to the continuity setting. Place the probes on the terminals of the switch. If the multimeter beeps or shows a reading, the switch is functioning correctly. If there is no response, the latch assembly needs to be replaced.
Replacing the Door Latch Assembly
To replace the door latch assembly, first gather the necessary tools: a screwdriver (usually a Torx or Phillips head) and a replacement latch assembly compatible with your dishwasher model. Begin by removing the screws securing the cover plate around the latch area. Carefully detach the cover to expose the latch assembly.
Disconnect the wires from the old latch by pressing the release tabs and pulling them away from the assembly. Remove any screws or fasteners holding the latch in place, then carefully pull it out. Insert the new latch assembly in the same position as the old one, securing it with screws. Reconnect the wiring harness, ensuring the connections are tight and secure.
Finally, reattach the cover plate and secure it with screws. Plug the dishwasher back into the power supply. Test the new door latch by closing the door firmly and checking for proper alignment and engagement. Ensure that the dishwasher runs without any leaks or operational issues, confirming that the replacement was successful.
Diagnosing Drainage Problems and Solutions
When your Samsung dishwasher is not draining properly, it can lead to water pooling at the bottom and unsanitary conditions. Understanding the causes of drainage problems and how to address them is essential for effective repair.
Common Causes of Drainage Issues
- Clogged Drain Filter: The drain filter can become blocked with food particles and debris, preventing proper drainage.
- Kinked Drain Hose: A bend or kink in the drain hose can restrict water flow.
- Faulty Drain Pump: The pump may fail to operate, resulting in water not being expelled from the machine.
- Blocked Air Gap: If your dishwasher has an air gap, it can become obstructed, leading to drainage issues.
- Improper Installation: Poor installation of the dishwasher can cause drainage problems, especially in the drain line placement.
Steps to Diagnose and Fix Drainage Problems
- Check the Drain Filter:Remove the filter located at the bottom of the dishwasher. Clean it under running water to remove any food residues and debris. Reinstall the filter and observe if the drainage improves.
- Inspect the Drain Hose:Examine the drain hose for kinks or bends. If you find any, straighten the hose. Ensure that it is properly secured to both the dishwasher and the sink drain.
- Test the Drain Pump:Locate the drain pump and listen for any unusual sounds during the drain cycle. If it is silent or making abnormal noises, it may need replacement. Consult the user manual for instructions on how to access and test the pump.
- Examine the Air Gap:If applicable, check the air gap for obstructions. Clean it if you notice any blockage.
- Review Installation:If previous steps do not resolve the issue, check the installation standards. Ensure that the drain hose is at the correct height and there are no bends that could impede drainage.
Following these diagnostic steps can help you identify and resolve drainage problems in your Samsung dishwasher. If issues persist, it may be best to contact a professional technician for further assistance.
Examining and Fixing Heating Element Failures
The heating element in a Samsung dishwasher plays a crucial role in ensuring that dishes are cleaned effectively by heating the water to the right temperature. If you notice that your dishes are not coming out clean or the drying cycle is inefficient, it may indicate a heating element failure. Follow these steps to examine and fix the issue.
First, ensure that the dishwasher is unplugged for safety purposes before beginning any inspection or repair work. Access the heating element by removing the lower spray arm and the cover panel beneath it, which usually involves unscrewing several screws.
Inspect the heating element for visible signs of damage such as cracks, burn marks, or corrosion. If you notice any of these issues, the heating element will likely need to be replaced. Use a multimeter to test the heating element for continuity. Set the multimeter to the resistance measurement mode and check the heating element terminals. A reading of zero ohms indicates a short circuit, while infinite resistance suggests a break in the element.
If the heating element is found to be faulty, purchase a replacement part that matches the model of your dishwasher. Before installation, ensure the new element is compatible by checking the specifications provided by the manufacturer.
During installation, position the new heating element in the correct place and secure it. Reattach the cover panel and the lower spray arm. Once everything is back in place, plug the dishwasher back into the power source.
Finally, run a test cycle to confirm that the heating element is functioning correctly. Monitor the washing and drying processes to ensure that the dishes are being cleaned and dried effectively. If problems persist, further inspection of the wiring and control board may be required to identify other potential issues.

Resolving Unusual Noises during Operation
Unusual noises from your Samsung dishwasher can be alarming and may indicate underlying issues. Identifying the source of the noise can help you determine the necessary repairs. Here are the common types of noises and steps to resolve them:
1. Common Types of Noises
- Grinding: Typically indicates something is stuck in the spray arms or the filter.
- Humming: Often related to the motor or a malfunctioning pump.
- Clanking: Can occur if dishes are improperly loaded or if there are foreign objects in the tub.
- Clicking: May originate from the door latch or the pump assembly.
2. Troubleshooting Steps
- Inspect the Spray Arms: Turn off the dishwasher and check for any obstructions in the spray arms. Remove and clean them if necessary.
- Check the Filter: Remove the filter located at the bottom of the dishwasher. Clean it thoroughly as debris can cause grinding noises.
- Examine the Load: Ensure that dishes are not protruding and interfering with the spray arms. Rearrange dishes if needed.
- Listen to the Motor: If humming persists, it may indicate a motor issue. Listen closely to identify if the noise is constant or intermittent.
- Inspect for Foreign Objects: Look for coins, utensils, or other items that may have fallen into the machine and are causing clanking sounds.
- Test the Door Latch: Ensure the door is properly sealed and check the latch for wear or damage if clicking is heard.
Regular maintenance and prompt attention to unusual sounds can prolong the lifespan of your dishwasher and enhance its performance. If the problem persists after these troubleshooting steps, consider contacting a professional technician for further assistance.
Checking and Replacing Water Inlet Valve
The water inlet valve in your Samsung dishwasher controls the flow of water into the appliance during the wash cycle. If your dishwasher is not filling with water, the inlet valve may be defective. Follow these steps to check and replace it if necessary.
Step 1: Safety First
Before beginning any repair, ensure your dishwasher is unplugged from the power source. Additionally, turn off the water supply to prevent any leaks or spills during the process.
Step 2: Accessing the Inlet Valve
Locate the water inlet valve, typically found at the bottom of the dishwasher. You may need to remove the lower dish rack to access it. Depending on your model, the valve is often near the rear or side wall of the appliance.
Step 3: Inspecting the Valve
Check the inlet valve for any visible signs of damage, such as cracks or leaks. Disconnect the water line leading to the valve by loosening the fitting. Use a towel to catch any water that may spill out.
Step 4: Testing the Valve
Use a multimeter set to the ohms setting to test the inlet valve for continuity. Disconnect the electrical connector from the valve and place the multimeter probes on the valve terminals. A reading of 200-500 ohms indicates the valve is functioning; otherwise, it needs replacement.
Step 5: Replacing the Valve
If the valve is defective, purchase a compatible replacement from an appliance parts store. Disconnect the electrical wires and unscrew the valve from its mount. Install the new valve by reversing the removal process, ensuring all connections are secure.
Step 6: Reassemble and Test
Reattach the water line and any other components you removed. Plug the dishwasher back in and turn on the water supply. Run a short cycle to check for leaks and ensure the appliance fills properly with water.
Regular maintenance of the water inlet valve can prevent future issues and extend the life of your Samsung dishwasher.
Resetting the Dishwasher for Error Codes
If your Samsung dishwasher is displaying error codes, resetting the appliance can often resolve the issue. This process helps to clear temporary faults and reboots the unit. Follow these steps for a proper reset:
Step 1: Power Off the Dishwasher
Locate the power button on the front panel of the dishwasher. Press it to turn off the unit. If your model does not have a power button, you can unplug the dishwasher from the electrical outlet. For hardwired units, you may need to turn off the circuit breaker.
Step 2: Wait for a Short Duration
Allow the dishwasher to remain powered off for at least 5 minutes. This pause enables the internal systems to reset and clears any stored error codes. In some cases, waiting longer–up to 10 minutes–can be beneficial.
Step 3: Restore Power
Turn the dishwasher back on by pressing the power button or plugging it back in. If you used the circuit breaker, switch it back to the ‘on’ position. Check the display for any error messages.
Step 4: Test the Cycle
Select a quick wash or rinse cycle to test the functionality of the dishwasher. Observe the machine as it operates, noting if the error code reappears. If the appliance runs smoothly, the reset was successful.
Step 5: Further Troubleshooting
If the error code persists after resetting, consult the owner’s manual for specific error code definitions and troubleshooting steps. Persistent issues may require professional assistance or exploration of deeper mechanical problems.
Resetting your Samsung dishwasher is an effective first step to address minor issues. Regular maintenance and cleaning can also help prevent error codes in the future.
Q&A — Samsung dishwasher repair:
What are the common signs that my Samsung dishwasher needs repair?
Common signs include water not draining properly, unusual noises during operation, dishes not getting clean, leaking water, or if the dishwasher fails to start. If you observe any of these issues, it’s a good indication that your appliance may require attention. Conducting regular checks can help you catch problems early.
How can I troubleshoot my Samsung dishwasher before calling a technician?
Begin with simple troubleshooting steps. First, check the power supply to ensure the dishwasher is plugged in and the circuit breaker is not tripped. Next, inspect the door latch; a faulty latch may prevent the dishwasher from starting. Clean the filter to ensure proper water flow, and examine the spray arms for any blockages. If these steps do not resolve the issue, it may be time to seek professional help.
What tools do I need for Samsung dishwasher repair at home?
Essential tools for repairing a Samsung dishwasher typically include a screwdriver set (both Phillips and flathead), pliers, a multimeter for electrical tests, and towels for cleaning up any spills. Depending on the specific issue, a replacement part such as a pump or a door latch may also be required. Having these tools on hand will help you address common repairs effectively.
Are there any DIY repairs I can attempt to fix my Samsung dishwasher?
Yes, several DIY repairs can be tackled by homeowners. For instance, you can clean the dishwasher filter, check and unclog the drain hose, or replace the dishwasher door seal if it’s damaged. Additionally, you might be able to replace worn out spray arms or change the dishwasher’s drain pump. Always ensure you disconnect the power before attempting any repairs, and consult the owner’s manual for guidance specific to your model.
When should I consider hiring a professional for my Samsung dishwasher repair?
If basic troubleshooting and DIY repairs do not resolve the issue, or if the problem involves complex electrical or plumbing components, it may be best to hire a professional. Signs that you should seek help include persistent leaks, serious electrical issues, or if the dishwasher shows error codes that are hard to interpret. Professional technicians have the expertise and tools to address these problems safely and effectively.
Choose APPLIANCE REPAIR in San Jose for you today and get fast, dependable service from technicians who truly care about your comfort — schedule your appointment now and restore your home’s convenience in no time.