Maytag repair and proactive maintenance are essential for ensuring the longevity and efficiency of your appliances. Over time, even the most reliable machines can experience wear and tear, potentially leading to costly repairs or replacements. By implementing a few simple maintenance strategies, you can significantly extend the life of your appliances and keep them operating at peak performance.
Regular Maintenance is a key component in appliance longevity. Routine checks and servicing can help identify minor issues before they escalate into major problems. When it comes to Maytag products, adhering to the manufacturer’s recommended maintenance schedule can prevent many common failures.
Another important aspect to consider is proper usage. Many appliance-related issues arise from improper handling or overloading. Familiarizing yourself with the operational guidelines specific to your Maytag models will not only enhance their efficiency but also lead to significant savings over time.
In addition, investing in quality repair services when needed can make a substantial difference. Choosing certified professionals familiar with Maytag appliances ensures that repairs are handled correctly, thereby avoiding future complications. Understanding when to seek help can save you both time and money in the long run.
Regular Maintenance Tasks for Your Maytag Appliances
Keeping your Maytag appliances running efficiently requires consistent maintenance. Here are essential tasks that can prolong the life of your appliances and enhance their performance.
Refrigerator Care
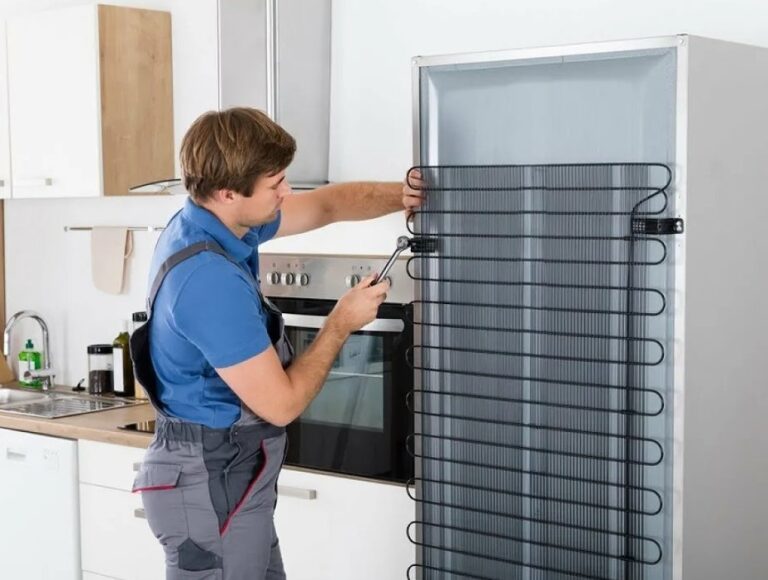
Regularly check and clean the condenser coils on your refrigerator. Dust and debris can accumulate over time, causing your appliance to work harder and consume more energy. Cleaning the coils every six months with a vacuum or a coil brush will improve efficiency. Additionally, ensure that door seals are intact and free from cracks. This prevents cold air from escaping and helps maintain optimal temperatures inside the fridge.
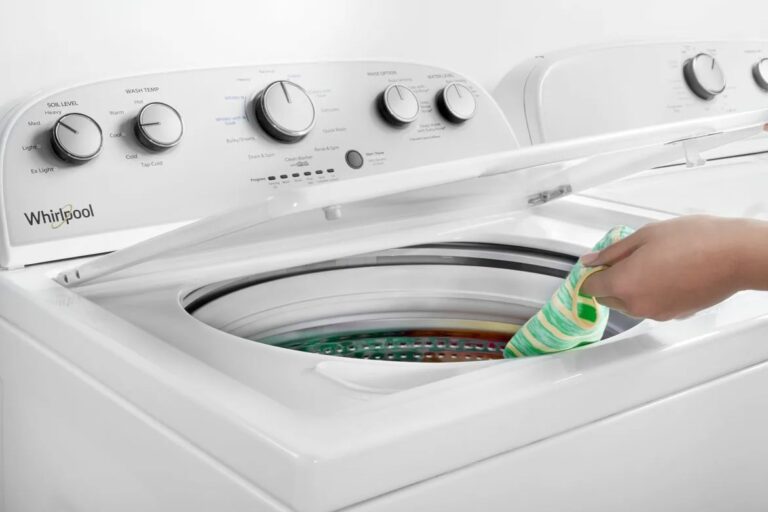
For your Maytag washer, it’s important to routinely clean the detergent dispenser and door seal to prevent mold and mildew buildup. Run a cleaning cycle monthly with a washer cleaner to eliminate residues. In the case of your dryer, regularly clean the lint filter after every load to improve airflow and reduce fire hazards. Check the venting system at least once a year to ensure it is clear of lint and debris, which can hinder performance and increase drying times.
Identifying Early Signs of Appliance Wear and Tear
Recognizing the early signs of wear and tear in your appliances can help prevent costly repairs and extend their lifespan. Regular maintenance begins with observing unusual behaviors or changes in performance.
One of the first indicators of appliance issues is unusual noises. Sounds such as grinding, squeaking, or rattling can signify mechanical problems or loose components. If you notice these sounds, inspect the appliance for any visible damage or loose parts.
Another sign to watch for is excessive vibration or movement. Appliances like washers or dryers should run smoothly. If you experience prolonged vibrations, it may indicate uneven loading or wear in internal parts.
Watch for changes in functionality. For instance, if a refrigerator struggles to maintain its temperature or a dishwasher fails to clean dishes effectively, it may signal that components are wearing out or require maintenance.
A buildup of condensation or leaks around appliances is a clear sign of potential trouble. Water pooling around a refrigerator, for example, can indicate problems with the water line or seals. Prompt attention is crucial to prevent further damage.
Unpleasant odors emanating from appliances can also indicate issues. For example, a burning smell may suggest electrical problems or overheating. Regularly inspect for any strange smells and address the source immediately.
Lastly, keep an eye on energy bills. An unexpected increase can indicate that an appliance is working harder than necessary due to wear and tear, thereby consuming more energy.
Regular inspections and prompt actions upon noticing these signs can greatly enhance the lifespan and reliability of your appliances.
Cleaning Tips for Maytag Refrigerators and Washers
Maintaining your Maytag appliances, including refrigerators and washers, is essential for their longevity and optimal performance. Regular cleaning not only prevents build-up but also ensures that they function efficiently. Here are some effective cleaning tips for both appliances.
Cleaning Your Maytag Refrigerator
1. Interior Cleaning: Empty the refrigerator and remove all food items. Use a solution of warm water and mild soap to wipe down shelves, drawers, and walls. For stubborn stains, a mixture of baking soda and water can work wonders. Rinse with a clean, damp cloth and dry thoroughly.
2. Door Seals: Inspect and clean the door seals with a mixture of warm water and vinegar. This ensures a proper seal and prevents energy loss. Pay attention to any debris that may be lodged in the seals.
3. Coils Maintenance: Dust and dirt can accumulate on the condenser coils, affecting cooling efficiency. Use a vacuum cleaner or a coil cleaning brush to gently remove the dust from the coils located at the back or bottom of the refrigerator.
Cleaning Your Maytag Washer
1. Drum and Gasket Care: For front-load washers, regularly check and clean the rubber gasket around the door. Use a mixture of equal parts water and vinegar to wipe it down, removing any mildew or detergent residue. For the drum, run an empty cycle with hot water and one cup of vinegar to cleanse and deodorize.
2. Dispenser Drawers: Remove the detergent dispenser drawer and clean it under warm water. Use a soft brush to eliminate any build-up of detergent residue. Make sure it is completely dry before reinserting it into the washer.
3. Filter Maintenance: Regularly check the lint filter or pump filter (if applicable) for any blockages. Clean it as per the manufacturer’s instructions to prevent drainage issues and to promote efficient washing cycles.
Incorporating these cleaning practices into your regular maintenance routine will help ensure your Maytag refrigerators and washers continue to operate at their best for years to come.
Best Practices for Using Maytag Ovens and Ranges
To ensure optimal performance and longevity of your Maytag oven and range, it is crucial to follow specific best practices. Regular maintenance and proper usage can significantly extend the life of your appliance.
First, always preheat your oven before placing food inside. Preheating ensures even cooking and improves the overall quality of your baked goods. Refer to your user manual for the appropriate preheating times for various cooking functions.
Use the correct cookware designed for oven use. Opt for materials like glass, ceramic, or metal that can withstand high temperatures. Avoid using aluminum foil on the bottom of your oven, as this can obstruct airflow and cause heat retention, leading to uneven cooking.
Regularly clean your oven and range to prevent buildup of grease and food residue. Use a gentle oven cleaner and a soft cloth to avoid scratches on the surfaces. Schedule routine cleaning every month to maintain optimal performance.
Avoid using your oven’s self-cleaning feature excessively. While it is effective for deep cleaning, frequent use can put added stress on the appliance. Limit it to a few times a year, and always follow the manufacturer’s guidelines when doing so.
Keep an eye on the temperature accuracy. If you notice significant discrepancies between the expected and actual temperatures, consider calibrating your oven. Refer to the user manual for calibration instructions or consult a professional technician if needed.
Store baking sheets and pans within the oven when not in use, but ensure they are clean and placed correctly. This avoids potential damage to the oven interior while keeping your cookware handy.
Utilize the oven light instead of opening the door to check on your food. Opening the oven door can cause temperature fluctuations, prolonging cooking times. Only open the door when necessary to ensure consistent cooking results.
Lastly, be aware of your oven’s cooking modes and settings. Familiarize yourself with features like convection baking or broiling, as these can enhance your cooking process when used appropriately. Each mode serves different purposes and can yield better outcomes when used correctly.
How to Properly Store Maytag Appliances During Seasonal Changes
Storing Maytag appliances correctly during seasonal transitions is essential for maintaining their functionality and longevity. Neglecting proper storage can lead to damage and costly repairs. Follow these guidelines to ensure your appliances remain in excellent condition.
- Clean the Appliances: Before storing any appliance, thoroughly clean it. Remove food residue, dust, and any other contaminants. This step is crucial in preventing mold and odors.
- Disconnect Power and Water Supply: For appliances like refrigerators and dishwashers, ensure they are disconnected from power sources. Turn off and drain any water supply to avoid leaks and water damage.
- Dry Completely: Post-cleaning, ensure all appliances are completely dry. Open doors and allow air circulation to prevent moisture accumulation, which can lead to rust or mold.
- Use Protective Covers: If storing appliances outdoors or in a garage, invest in protective covers. These can provide an extra layer of protection against dust, moisture, and pests.
- Avoid Extreme Temperatures: Store appliances in a climate-controlled environment if possible. Extreme cold or heat can affect their components and functionality.
- Store Upright: Ensure that appliances like refrigerators are stored upright as per manufacturer instructions. Laying them down can cause damage to internal components.
- Regularly Check Stored Appliances: During the storage period, periodically check on the appliances. Inspect for signs of moisture, pests, or other damage that may require immediate attention.
- Follow Manufacturer Guidelines: Always refer to the user manual for specific storage instructions and recommendations for your Maytag appliances.
By adhering to these storage guidelines, you can protect your Maytag appliances during seasonal changes, ensuring they remain in optimal condition and are ready for use when needed.
Understanding Warranty Coverage for Maytag Products
When investing in Maytag appliances, understanding the warranty coverage is crucial to ensure you receive the full benefits of your purchase. Maytag offers a variety of warranty options that typically cover defects in materials and workmanship, providing consumers with peace of mind and protection against unexpected repair costs.
Types of Warranties
Maytag appliances generally come with a limited one-year warranty that covers parts and labor for any repairs needed due to manufacturing defects. Additionally, certain components, such as the refrigerator compressor or the oven cavity, might have extended warranty periods that range from five to ten years. Always consult the warranty booklet provided with your appliance to determine the specifics.
Claiming Warranty Service
To utilize warranty service, it is recommended that customers report issues promptly to ensure they remain within the warranty period. Documentation, such as the original purchase receipt and the warranty registration, may be required to initiate a claim. It is also essential to follow the manufacturer’s recommended care and maintenance guidelines to keep the warranty valid. If a service visit is necessary, always contact an authorized Maytag repair technician to ensure that your warranty remains intact.
Tools You Need for Basic Maytag Repairs
Having the right tools is essential for performing basic repairs on your Maytag appliances. Here is a list of essential tools that will help you carry out maintenance and minor repairs effectively.
1. Screwdrivers: A set of flathead and Phillips screwdrivers is crucial for opening panels and accessing internal components. Choose a set with various sizes to tackle different screws found in appliances.
2. Pliers: Pliers are useful for gripping, twisting, or cutting wires. Needle-nose pliers can be particularly helpful for reaching tight spaces inside your appliance.
3. Wrenches: An adjustable wrench or a set of socket wrenches will allow you to loosen or tighten nuts and bolts. This is especially useful for components that may need to be replaced, like valves or brackets.
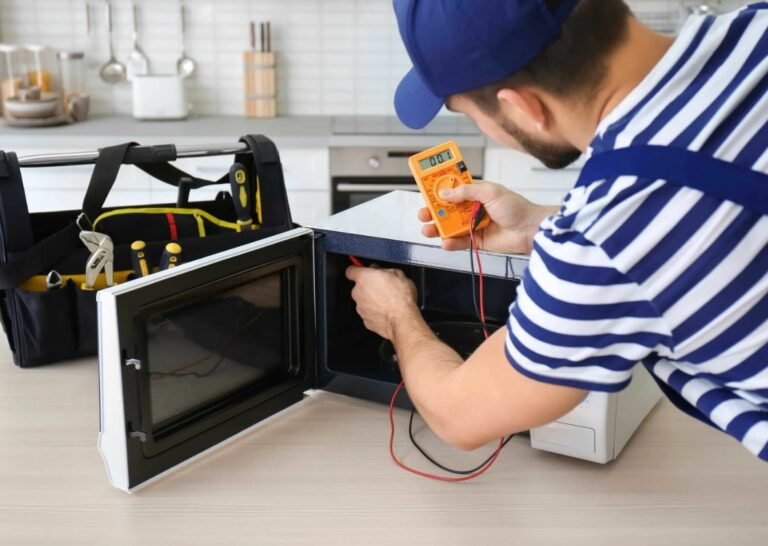
4. Multimeter: A multimeter is an essential tool for diagnosing electrical issues. It can help you check voltage, resistance, and continuity, ensuring that your appliance is functioning properly.
5. Level: A level is important for ensuring your appliance is properly aligned, which can prevent issues with performance and longevity, especially in washers and refrigerators.
6. Teflon Tape: This tape is used for sealing threaded connections in plumbing repairs, helping to prevent leaks in dishwashers or washing machines.
7. Heating Element Tester: If you’re working on a Maytag dryer or water heater, a specialized heating element tester can help you determine if the heating element is functioning properly.
8. Bucket: When working on repairs involving water lines, having a bucket handy can help catch any spills during maintenance, keeping your workspace clean and safe.
9. Cleaning Supplies: Keep a set of cleaning cloths, brushes, and vacuum attachments on hand to remove dust and debris from your appliances, which can enhance their performance and lifespan.
With these tools, you’ll be well-equipped to handle basic repairs and maintenance on your Maytag appliances, ensuring they continue to run efficiently for years to come.
When to Call a Professional for Maytag Repairs
Identifying the right moment to seek professional help for your Maytag appliances can save you time, money, and further complications. Here are key indicators that suggest it’s time to contact a technician:
- Persistent Issues: If your appliance continues to malfunction despite basic troubleshooting, such as resetting or cleaning, it’s best to consult an expert.
- Unusual Noises: Unexplained sounds like grinding, banging, or high-pitched whines can indicate internal problems that require professional assessment.
- Leaks or Water Damage: Any signs of leaking fluid, whether it’s from the dishwasher or washing machine, should not be ignored. A technician can help identify the source and prevent further damage.
- Error Codes: If your appliance displays error codes that you cannot resolve with the manual, a professional will have the tools and experience to troubleshoot these complex issues.
- Electrical Problems: Any signs of electrical malfunction, such as tripped breakers or smoking components, pose safety risks and necessitate immediate professional assistance.
- Age of Appliance: Older Maytag appliances may develop issues that require specialized knowledge. Aging parts can fail unexpectedly, and seeking a technician can be advantageous to prolonging the appliance’s life.
- Required Parts Replacement: When a repair involves replacing crucial components, it’s often best handled by a professional who ensures compatibility and proper installation.
Routine maintenance can extend the lifespan of your Maytag appliances, but recognizing when to call in the professionals is equally important. This not only ensures the safety and efficiency of your appliances but also helps prevent further damage and costly repairs down the line.
Energy-Saving Tips for Maytag Appliances
Maytag appliances are designed for durability and efficiency, but even the best appliances can benefit from energy-saving practices. Here are several tips to help you maximize the efficiency of your Maytag appliances while reducing energy consumption.
1. Optimize Your Refrigerator Settings
Set your refrigerator temperature between 35°F and 38°F for optimal performance. Keep the freezer at 0°F. Regularly check the door seals by closing the door on a dollar bill; if it slips out easily, it’s time to replace the seal. Additionally, avoid overcrowding the fridge, as this can restrict airflow and decrease efficiency.
2. Proper Use of Your Maytag Washer and Dryer
For washing machines, always run full loads to maximize water and energy use. Select the cold water setting whenever possible, as washing in cold saves more energy than washing in hot. With dryers, clean the lint filter after every use to improve air circulation, and consider air-drying clothes when weather permits.
| Appliance | Tip | Benefit |
|---|---|---|
| Refrigerator | Maintain optimal temperature settings | Improves efficiency and reduces energy use |
| Washer | Use cold water settings | Lower energy consumption |
| Dryer | Clean lint filter regularly | Enhances drying efficiency |
| Dishwasher | Run on eco mode or full loads | Conserves water and energy |
Implementing these energy-saving strategies not only helps the environment but also reduces your utility bills. Regular maintenance checks on your Maytag appliances, including cleaning coils and filters, will ensure they run efficiently and last longer.
Replacing Parts: Step-by-Step Guide for Maytag Models
Replacing parts in Maytag appliances can extend their lifespan and ensure optimal performance. This guide provides a systematic approach to replacing common components.
Step 1: Identify the Problem
Before replacing any parts, precisely diagnose the issue. Listen for unusual noises, check for leaks, or observe any error codes on the display. Refer to the user manual for troubleshooting tips pertinent to your specific Maytag model.
Step 2: Gather Necessary Tools
Collect the required tools before starting the replacement. Common tools include screwdrivers (flat and Phillips), pliers, a multimeter, and a socket set. Having these tools handy streamlines the repair process.
Step 3: Purchase Replacement Parts
Order genuine Maytag replacement parts from authorized dealers or online retailers. Ensure the parts are compatible with your specific model. You can find part numbers in the user manual or on the appliance itself.
Step 4: Unplug the Appliance
Safety is paramount. Always disconnect the appliance from the power source before beginning any repair work. This prevents accidental electric shock and protects the appliance from damage during repair.
Step 5: Disassemble the Appliance
Carefully remove any screws, panels, or covers that obstruct access to the faulty part. Keep the screws organized to facilitate reassembly. Take photos of the disassembly process to assist in correct reinstallation.
Step 6: Remove the Faulty Part
Once access is gained, carefully detach the malfunctioning component. Depending on the part, you may need to disconnect wires or hoses. Document or label connections to ensure correct reconnection later.
Step 7: Install the New Part
Position the new part in place and reconnect any cables or hoses, ensuring secure connections. Refer to your previous documentation or images to help guide the installation process.
Step 8: Reassemble the Appliance
Replace the covers, panels, or any components you removed earlier. Ensure all screws are tightened properly. A secure fit is essential for the appliance’s functionality and safety.
Step 9: Test the Appliance
After reassembly, plug the appliance back in and run a test cycle. Monitor the appliance for proper operation and check for any leaks or unusual sounds. If issues persist, double-check installations and connections.
Step 10: Dispose of Old Parts Properly
Dispose of the old parts following local regulations. Recycling is often an option, so check if the parts can be repurposed.
This step-by-step guide simplifies the process of replacing parts in Maytag appliances, helping you maintain their functionality and prolong their service life.
Q&A — Maytag repair:
What are some common maintenance tips for Maytag appliances?
Regular maintenance can significantly extend the life of your Maytag appliances. Start by cleaning the coils of your refrigerator to improve efficiency. For washing machines, check and clean the lint filter and hoses regularly. It’s also advisable to inspect seals and gaskets on ovens and dishwashers to prevent leaks. Regularly wiping down surfaces and ensuring that vents are not blocked can help keep your appliances running smoothly.
How often should I schedule professional repairs for Maytag appliances?
If your Maytag appliances are performing well, you may not need to schedule regular professional repairs. However, it’s wise to have an inspection every few years or whenever you notice a performance dip. If your appliance is under warranty, follow the manufacturer’s guidelines for servicing to keep your warranty intact. Listening for unusual noises or noticing a drop in efficiency could also indicate the need for a technician’s expertise.
What signs indicate that my Maytag appliance may need repairs?
There are several signs that might indicate your Maytag appliance requires attention. For example, if you notice unusual sounds, leaks, or a decrease in performance, these could be red flags. Additionally, if the appliance does not start at all or if it cycles on and off unexpectedly, it may be time to consult a professional. Keeping an eye on appliance efficiency can also provide early warnings for potential issues.
Are there specific cleaning products recommended for Maytag appliances?
For cleaning Maytag appliances, it’s essential to use non-abrasive cleaners to avoid damaging surfaces. Mild dish soap mixed with warm water typically works well for most appliances. For stainless steel finishes, consider using a cleaner specifically designed for stainless steel to avoid streaks. Always check the manufacturer’s guidelines for any specific products to avoid voiding warranties or causing damage.
How can I improve the efficiency of my Maytag appliances?
Improving the efficiency of your Maytag appliances can be achieved through several methods. Regular maintenance, such as cleaning filters and ensuring that installations are level, can enhance performance. For refrigerators, setting the temperature correctly is essential; usually around 37°F is optimal. For dishwashers, running full loads reduces water and energy use. Lastly, replacing old or worn parts promptly can help maintain efficiency levels over time.
Choose APPLIANCE REPAIR in San Jose for you today and get fast, dependable service from technicians who truly care about your comfort — schedule your appointment now and restore your home’s convenience in no time.