LG dryer repair knowledge can save you time and money, allowing you to get back to your daily tasks with minimal interruption when issues arise. When it comes to household appliances, the LG dryer stands out for its efficiency and reliability. However, like any machine, it can encounter problems over time that may disrupt your laundry routine. Understanding these common malfunctions and their solutions is the first step toward effective troubleshooting.
From heating inefficiencies to strange noises, LG dryers may exhibit various symptoms that signal a need for repair. Identifying these issues early on is crucial in preventing more extensive damage and ensuring the longevity of your appliance. In this article, we will explore the most frequently reported problems faced by LG dryer users and provide practical, straightforward solutions to tackle them effectively.
Whether you’re a seasoned DIY enthusiast or a novice looking to learn more about appliance maintenance, our guide aims to empower you with the knowledge needed to troubleshoot your LG dryer. By addressing these common issues promptly, you can maintain the performance of your dryer and extend its lifespan, ensuring that it continues to serve you well for years to come.
LG Dryer Repair: Common Issues and Fast Fix Solutions
LG dryers are reliable appliances, but like all machines, they can encounter issues over time. Understanding common problems can help you troubleshoot and fix them quickly, ensuring your laundry routine stays on track.
1. Dryer Won’t Start: If your LG dryer refuses to start, first check the power supply. Ensure the dryer is plugged in and that the circuit breaker has not tripped. If all is well, examine the door switch. A faulty door switch can prevent the dryer from activating if it doesn’t detect that the door is closed properly. Replacing the switch is a simple fix.
2. No Heat: A common complaint is that the dryer runs but does not produce heat. This could be due to a blocked vent. Inspect the venting system for lint buildup, as this can restrict airflow. Additionally, check the heating element for continuity using a multimeter. If the element is faulty, replacing it will restore heat.
3. Drum Not Turning: If the drum is not turning, the drive belt may be broken or worn out. Inspect the belt for any signs of damage and replace it if necessary. If the belt is intact, the issue could be with the motor. In this case, testing the motor for functionality will guide you on whether it needs repair or replacement.
4. Excessive Noise: Unusual sounds during operation can indicate loose or worn drum rollers or glides. Listen closely to identify the source of the noise. If it originates from the drum support, consider replacing the rollers. Regular maintenance can prevent this issue in the future.
5. Dryer Stops Mid-Cycle: If your dryer halts unexpectedly, it may be overheating. This could be due to a clogged vent or a faulty thermostat. Clean the vent thoroughly to ensure proper airflow. If the problem persists, testing the thermostat with a multimeter will help determine if it needs replacement.
With a basic understanding of these common issues and quick fixes, you can tackle LG dryer repairs effectively. Always remember to unplug the appliance before performing any maintenance or repairs for your safety.
Checking Power Supply Issues
When your LG dryer fails to operate, one of the initial troubleshooting steps is to verify the power supply. Power supply issues can arise from various sources, and understanding how to check them can save you time and prevent unnecessary repairs.
Inspecting the Power Cord
Begin by examining the power cord for any visible damage. Look for frays, cuts, or kinks that might disrupt the electrical flow. Ensure the cord is securely connected to both the dryer and the wall outlet. A loose connection can lead to power interruptions. If the cord appears damaged, it should be replaced immediately to avoid safety hazards.
Testing the Wall Outlet
Next, test the wall outlet to confirm it is supplying power. Use a multimeter to check the voltage; a standard dryer outlet should read approximately 240 volts. If the voltage is significantly lower or non-existent, the outlet may be faulty. Alternatively, you can plug in another appliance to see if it works, confirming that power is reaching the outlet. If neither test succeeds, you may need to consult an electrician to assess the electrical circuit.
Troubleshooting No Heat Problems
No heat issues in LG dryers can be frustrating, but they are often fixable with a few troubleshooting steps. Here’s a guide to help you identify and resolve common causes of no heat in your LG dryer.
Common Causes
- Tripped Circuit Breaker: The dryer operates on two circuits. If one tripped, the drum may still turn but there won’t be heat.
- Faulty Heating Element: The heating element can break over time, resulting in no heat during cycles.
- Thermal Fuse Issues: A blown thermal fuse will cut power to the heating element, preventing heat production.
- Blocked Ventilation: Restricted airflow due to lint buildup can cause the dryer to overheat and stop heating.
- Defective Thermostat: A faulty thermostat may not signal the heating element to turn on.
Troubleshooting Steps
- Check the Circuit Breaker: Inspect the electrical panel and reset any tripped breakers.
- Inspect the Heating Element: Use a multimeter to check for continuity. Replace if defective.
- Examine the Thermal Fuse: Locate the thermal fuse and test it for continuity. Replace if blown.
- Clean the Venting System: Clear any lint buildup in the vent hose and lint screen. Ensure proper airflow.
- Test the Thermostat: Check the thermostat with a multimeter. Replace it if it’s not functioning.
By following these steps, you can usually identify the root cause of the no heat problem. If issues persist after troubleshooting, consider consulting a professional technician for further assistance.
Resolving Drum Not Spinning
The issue of a dryer drum not spinning can be frustrating and may arise from several causes. Here are the common reasons and their quick solutions:
- Power Supply Issues:
- Ensure the dryer is plugged in securely.
- Check that the circuit breaker has not tripped.
- Test the outlet with another device to confirm functionality.
- Door Switch Problems:
- Inspect the door latch to ensure it closes properly, as the dryer won’t operate if the door is ajar.
- Test the door switch with a multimeter to check for continuity.
- If faulty, replace the door switch immediately.
- Belt Issues:
- Listen for a squeaking noise indicating a worn belt.
- Remove the front panel to examine the drum belt for breaks or wear.
- If damaged, install a new drum belt.
- Motor Malfunctions:
- Check if the motor is overheating or making unusual noises.
- Ensure the motor is not jammed by inspecting the drum and surrounding components.
- If the motor has failed, it may require replacement.
- Drum Rollers or Support System:
- Inspect the drum support rollers for wear or damage.
- Check for blockages that prevent the drum from spinning.
- Lubricate or replace roller assemblies as needed.
After identifying the issue and implementing the fix, test the dryer. If the drum still does not spin, it may be advisable to consult a professional technician for further diagnosis.
Fixing Loud Noises During Cycles
Loud noises during drying cycles can be an indication of various underlying issues in your LG dryer. Identifying the source of the noise is essential for effective repairs. Here are common causes and their respective solutions.
Common Causes of Loud Noises
- Foreign Objects: Items like coins, buttons, or other small debris can get trapped in the drum or lint filter, causing rattling sounds.
- Worn Drum Rollers: Over time, drum rollers can wear out and lead to squeaking or grinding noises when the drum rotates.
- Belt Issues: A frayed or loose belt can produce a loud squealing sound as it struggles to turn the drum.
- Malfunctioning Bearings: Damaged or worn drum bearings can create a deep thumping noise during operation.
- Vibration Issues: An unlevel dryer can lead to excessive vibration and noise during cycles.
Fast Fix Solutions
- Inspect for Foreign Objects: Open the dryer door and check the drum and lint filter for any loose items. Remove them to eliminate rattling.
- Check and Replace Drum Rollers: To assess the condition, remove the dryer drum and inspect the rollers. If they appear worn, replace them for quieter operation.
- Examine the Belt: If you hear a squeal, check the belt for signs of wear. Replace it if it is frayed or loose.
- Inspect Bearings: If you suspect bearing issues, remove the drum to check the bearings. Replace them if necessary to stop thumping sounds.
- Level the Dryer: Use a level tool to check the dryer’s position. Adjust the feet as needed to ensure the appliance sits evenly on the floor.
By addressing these common issues promptly, you can restore quiet operation to your LG dryer and extend its lifespan.
Addressing Faulty Timer Problems
One of the common issues faced by LG dryer users is a faulty timer. A malfunctioning timer can lead to various problems, including the dryer failing to start, not progressing through cycles, or running longer than necessary. Identifying and resolving these timer issues is crucial for the effective operation of your dryer.
Symptoms of a Faulty Timer
Before proceeding with repairs, it’s essential to recognize the signs of a faulty timer. If your dryer does not advance through the selected cycle, or if you experience inconsistent drying times, these may indicate a timing issue. Additionally, if the timer does not count down or if it gets stuck at a certain point, further inspection is needed.
Steps for Troubleshooting and Repairing the Timer
Begin by unplugging the dryer to ensure safety. Access the timer by removing the control panel, following the manufacturer’s guidelines. Inspect the timer for any visible damage, such as burn marks or malfunctions in the knob. If no external issues are detected, use a multimeter to test the timer’s continuity. A lack of continuity may signify a defective timer that needs replacement. Once you identify the problem, obtain a compatible replacement part from a trusted source. After replacing the timer, reassemble the control panel and plug the dryer back in. Test the appliance to confirm that the issue is resolved and that the dryer operates correctly.
Handling Error Codes Display
LG dryers are equipped with diagnostic systems that display error codes to help identify malfunctions. Understanding these codes is essential for troubleshooting and ensuring optimal performance of your dryer. Here are some common codes and their meanings, along with quick solutions.
Common Error Codes
One of the frequently encountered error codes is the «dE» code, which indicates a door issue. This could be due to an improperly closed door or a malfunctioning door switch. To resolve this, ensure the door is securely closed, and if the issue persists, inspect the door latch and switch for damage.
Another common code is «tE,» signaling a possible temperature sensor malfunction. This issue can lead to overheating or insufficient drying. You should check the sensor and connections. If necessary, replace the temperature sensor for accurate readings.
Steps to Resolve Error Codes
When you encounter an error code, the first step is to reset your dryer. Unplug the unit for about five minutes to clear the code, then plug it back in. If the error persists, consult the user manual for specific troubleshooting steps. Take note of any additional symptoms accompanying the error code, as they can provide more context for diagnosing the issue.
If basic troubleshooting does not resolve the problem, consider contacting a certified technician for further assistance. Regular maintenance and understanding error codes can help prolong the life of your LG dryer and enhance its efficiency.
Inspecting and Replacing Lint Filters
The lint filter in your LG dryer plays a crucial role in maintaining efficiency and safety during drying cycles. Over time, lint can accumulate, leading to reduced airflow, extended drying times, and potential fire hazards. Therefore, regular inspection and replacement of the lint filter are essential to ensure optimal performance.
To inspect the lint filter, first, remove it from its compartment, typically located at the front or the top of the dryer. Examine the filter for visible lint buildup. If you notice excessive accumulation, it is imperative to clean the filter. You can do this by using your hands to gently remove the lint or by using a soft brush or vacuum attachment. Rinse the filter under warm water to eliminate any stubborn debris. Ensure the filter is completely dry before re-installing it.
In some cases, the lint filter may become damaged, affecting its ability to trap lint effectively. Look for tears, holes, or warping that could compromise its function. If the filter is compromised, it should be replaced promptly. To find the appropriate replacement filter, refer to your dryer’s user manual or contact LG support for assistance in locating the right part.
Replacing the lint filter is a straightforward process. Simply slide the new filter into the designated slot until it is securely in place. Regularly check and clean the filter after every use to promote efficient drying and prevent potential hazards.
By prioritizing the inspection and replacement of your LG dryer’s lint filter, you can enhance the dryer’s performance while ensuring safety in your home.
Checking for Blocked Ventilation
Blocked ventilation is a common issue that can significantly affect the performance of your LG dryer. Proper air flow is crucial for efficient drying and to prevent overheating, which can lead to further complications and even pose a fire hazard.
Signs of Blocked Ventilation
To determine if your dryer ventilation is blocked, observe the following signs: clothes taking longer than usual to dry, the dryer overheating, a musty smell in the drum, or lint accumulation around the dryer exhaust. If you notice any of these symptoms, it’s time to check the ventilation system.
Steps to Check and Clear Blockages
Begin by unplugging the dryer to ensure safety. Inspect the lint trap and clean it thoroughly, as a clogged filter can hinder airflow. Next, examine the vent hose connected to the dryer. Detach it and check for lint buildup; use a vacuum or a flexible brush to remove any debris. Also, inspect the outside vent cap to ensure it opens freely and is not obstructed by external factors like bird nests or debris. Reconnect everything securely, plug in the dryer, and run a short cycle to confirm that airflow has been restored.
Solving Water Leakage Issues
Water leakage in an LG dryer can lead to significant damage and inefficiency. Identifying the source of the leakage is crucial for effective repairs. Common causes of water leakage include clogged vents, damaged door seals, and faulty internal components.
One primary culprit for water leakage can be a blocked venting system. If the dryer’s vent is obstructed by lint or debris, moisture cannot escape properly, leading to water buildup. Regularly checking and cleaning the vent can help prevent this problem.
Another frequent cause is a damaged door seal. Over time, the seal may wear out or become torn, allowing moisture to escape. Inspect the door seal for any signs of wear and replace it if necessary. Ensuring the door closes properly can also mitigate leakage.
If the issue persists, the internal components, such as the water pump or drain hose, may be malfunctioning. Inspect the water pump for blockages and ensure the drain hose is securely connected without any cracks or leaks. Replacing a faulty water pump or hose might be required to resolve the issue.
Always prioritize safety by unplugging the dryer before performing any maintenance. If you are unable to resolve the issue after these checks, consider contacting a professional technician for assistance.
| Common Causes | Solutions |
|---|---|
| Clogged vents | Clean the vent and ductwork regularly. |
| Damaged door seal | Inspect and replace the door seal as needed. |
| Faulty water pump | Check for blockages and replace the water pump if necessary. |
| Loose drain hose | Ensure the drain hose is securely connected. |
Examining Door Seal Integrity
The door seal on your LG dryer plays a crucial role in maintaining the efficiency of the drying process. A compromised seal can lead to heat loss, increased drying times, and even moisture escaping that may cause damage to your laundry room. Regularly examining the integrity of the door seal is essential for optimal performance.
Signs of a Faulty Door Seal
Several indicators can suggest that your dryer’s door seal is damaged or worn out. Look for the following signs:
- Visible cracks or tears in the seal material.
- Excessive lint buildup around the door area.
- Odors or dampness in the dryer drum following a cycle.
- The door does not close properly or feels loose.
Inspecting and Repairing the Door Seal
To ensure a proper seal, first conduct a visual inspection. If you notice any visible damage, replacement is necessary. Start by gently pulling back the door seal and checking for any signs of wear. If the seal appears intact but you still have issues, consider performing the following steps:
Cleaning: Sometimes dirt and lint can prevent a proper seal. Wipe the door and the surrounding area with a damp cloth to remove any debris.
Replacement: If cleaning does not solve the problem, replacement may be required. Purchase a genuine LG door seal replacement and follow the manufacturer’s instructions for installation. Typically, this involves removing screws and brackets that hold the seal in place.
By regularly examining the door seal integrity, and taking prompt corrective measures, you can enhance your dryer’s performance and prolong its lifespan.
Replacing Worn-out Belts
One of the most common issues with LG dryers is worn-out belts. The drying drum relies on these belts to rotate; when they become frayed or broken, the dryer will not function properly. Addressing this issue promptly can prevent further damage to the appliance and ensure efficient operation.
Identifying a Worn-out Belt
Signs of a worn-out belt include unusual noises during operation, failure of the drum to spin, or a burning smell emanating from the dryer. Regular checks can help catch the deterioration early, which is essential for maintaining the performance of your LG dryer.
Steps to Replace the Belt
To replace a worn-out belt, follow these steps:
- Unplug the Dryer: Safety first! Disconnect the power supply to avoid any electrical hazards.
- Remove the Front Panel: Use a screwdriver to take off the screws holding the front panel in place. Gently lift it away.
- Access the Drum: Take out the drum by releasing the tension from the belt. You may need to loosen other components, such as the idler pulley.
- Install the New Belt: Place the new belt around the drum and the motor pulley. Ensure it fits snugly in the grooves of the pulleys.
- Reassemble the Dryer: Carefully put the drum back in position, reattach the front panel, and secure all screws.
- Test the Dryer: Plug the dryer back in and run a short cycle to ensure that everything is functioning correctly.
Regular maintenance and prompt replacement of worn-out parts can significantly extend the life of your LG dryer. Keeping an eye on the condition of the belts will help maintain efficiency and prevent future breakdowns.
Resetting the Dryer for Software Glitches
Resetting your LG dryer can resolve various software-related issues that may hinder its performance. When the dryer shows irregular behavior, such as unresponsive controls or error codes, a reset might restore normal functionality.
Steps to Reset Your LG Dryer
Follow these straightforward steps to reset your LG dryer:
| Step Number | Instruction |
|---|---|
| 1 | Unplug the dryer from the power outlet to disconnect it from the electrical supply. |
| 2 | Wait for at least 10 minutes to ensure that any residual power is discharged. |
| 3 | Press and hold the «Start» button for about 5 seconds to drain any stored energy. |
| 4 | Plug the dryer back into the outlet. |
| 5 | Turn the dryer on and check if the issue has been resolved. |
When to Consider a Reset
Consider resetting your LG dryer when encountering the following symptoms:
- The display screen is unresponsive.
- Error codes are displayed consistently.
- The drying cycle does not start or stop unexpectedly.
- The dryer does not progress through its cycles.
Performing a reset can often clear minor software glitches and restore your dryer to optimal operation. If problems persist after resetting, consulting the user manual or contacting a professional technician may be necessary.
Q&A — LG dryer repair :
What are some common issues that might arise with an LG dryer?
Common issues with LG dryers include the dryer not starting, excessive noise during operation, clothes not drying properly, and the dryer overheating. Each of these problems can often be fixed with some basic troubleshooting rather than calling a professional technician.
How can I fix my LG dryer if it won’t start at all?
If your LG dryer won’t start, first check if it’s plugged in and the circuit breaker hasn’t tripped. Ensure that the door is securely closed since most models won’t operate if the door is ajar. If these steps do not solve the issue, check the control panel for any error codes, which could point to a specific malfunction. Resetting the dryer by unplugging it for a few minutes may also help resolve minor electronic glitches.
What should I do if my LG dryer is making a loud noise while operating?
Loud noises can indicate several issues. First, check the drum for any foreign objects that may be causing the noise. It could also be that the dryer belt is worn out or that the roller bearings need lubrication. If the noise persists, inspect the drum support and motor; these components may need adjustments or replacement. It’s advisable to consult the user manual for specific guidance on your model.
Why are my clothes still damp after a drying cycle, and how can I fix this?
If clothes remain damp after a drying cycle, make sure not to overload the dryer, as this can prevent proper airflow and drying. Check that the lint filter is clean and the venting system is not blocked, as these can impede performance. If the issue continues, there may be a problem with the heating element or the thermostat, and examining these components might be necessary to restore optimal function.
What tools are essential for basic LG dryer repair?
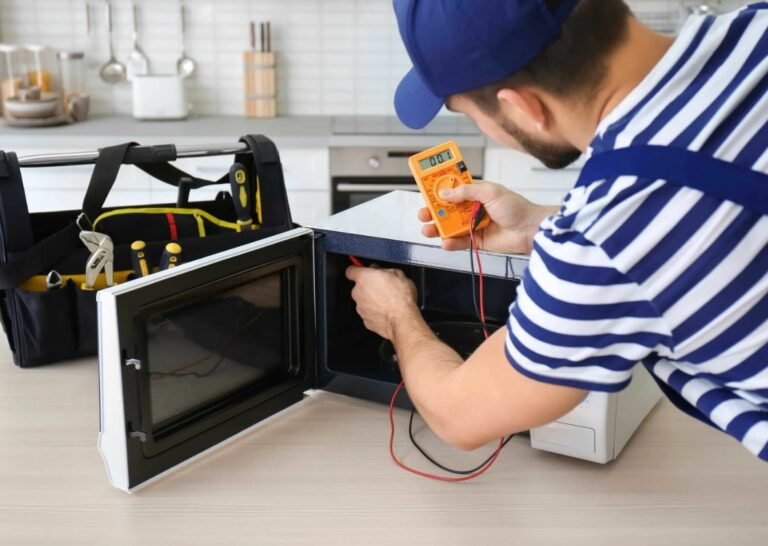
For basic LG dryer repair, you’ll need a few essential tools. First, screwdrivers – both Phillips and flathead – for removing panels and accessing internal components. A multimeter is crucial for checking voltage, resistance, and continuity. Pliers and an adjustable wrench help with removing fasteners and hoses. Brushes and a vacuum with a narrow nozzle are useful for cleaning lint filters and vents. A flashlight makes it easier to see inside dark areas. Finally, silicone lubricant can be used on bearings and door seals. These tools cover most basic dryer repairs safely and efficiently.
How do I troubleshoot an LG dryer that stops mid-cycle?
Can I perform LG dryer repair myself or should I hire a technician?
You can repair an LG dryer yourself if the issue is simple—like a clogged filter, overheating, or a basic reset. But for motor failures, sensor issues, or control board problems, hiring a certified technician is safer. Professional diagnostics help prevent bigger and more expensive damage from incorrect DIY repairs.
What safety precautions should I take during LG dryer repair?
When repairing an LG dryer, always begin by disconnecting the appliance from the power source to prevent electric shock. Ensure the gas supply is turned off if you are working on a gas model. Wear protective gloves and safety glasses to avoid cuts, burns, or debris injuries. Make sure the dryer is placed on a stable, flat surface to prevent tipping. Avoid working in wet or humid conditions, and keep tools organized to prevent accidents. Never touch internal components immediately after use—they may be extremely hot. If you notice damaged wiring, burning smells, or gas leaks, stop immediately and call a qualified technician.
How do I replace the heating element during LG dryer repair?
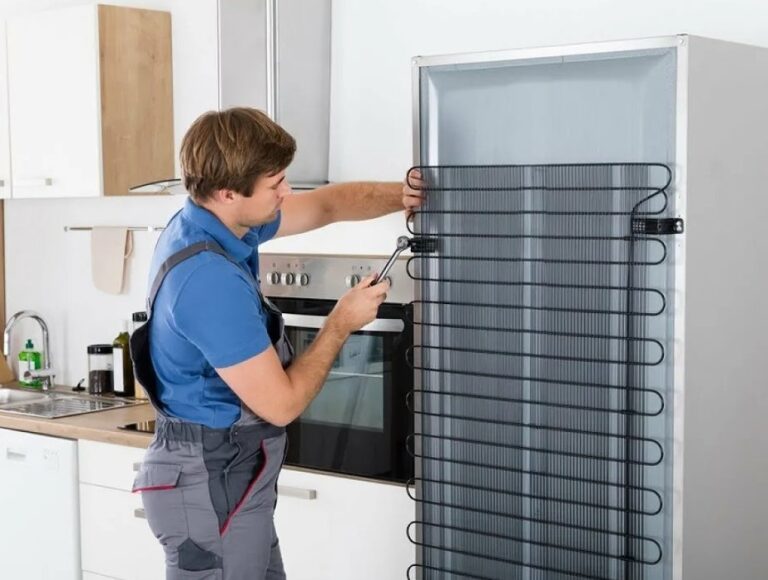
Replacing the heating element in an LG dryer requires careful attention to safety and proper disassembly. First, unplug the dryer and move it to a well-lit workspace. Remove the back panel or front panel, depending on the model, to access the heater assembly. Locate the heating element housing, disconnect the wiring, and take note of each connection. Unscrew the mounting brackets and carefully remove the old element. Install the new heating element in the same position, secure it with screws, and reconnect the wires. Before reassembling the dryer, check for loose parts or damaged wires. Finally, reattach the panels, plug in the dryer, and test its performance.
What does it mean if my LG dryer displays an error code during operation?
How do I clean and maintain the vent system as part of LG dryer repair?
Cleaning and maintaining the vent system is an important part of LG dryer repair, as it ensures proper airflow and prevents overheating. Start by unplugging the dryer and pulling it away from the wall. Remove the vent hose and clear out any visible lint or debris using a vacuum or a vent brush. Check the exterior vent cap to make sure it opens freely and isn’t blocked by dust, insects, or dirt. It’s also helpful to clean the inside of the dryer’s lint trap housing. Regular vent maintenance improves drying efficiency, reduces energy use, and helps prevent potential fire hazards.
What are the signs that an LG dryer drum needs repair or replacement?
Signs that an LG dryer drum may need repair or replacement often include unusual noises such as banging, squeaking, or rattling during operation. If the drum wobbles, feels loose, or doesn’t rotate smoothly, this indicates worn bearings, rollers, or support shafts. Visible damage like dents, cracks, or warping on the drum surface also signals the need for attention. Additionally, uneven drying or clothes getting caught can result from drum misalignment. Ignoring these symptoms can lead to more severe mechanical issues. Regular inspection and timely repair help maintain dryer efficiency and prevent costly replacements of other components.
How do I fix an LG dryer that is overheating?
If your LG dryer is overheating, the first step is to check and clean the lint filter, as clogged lint can restrict airflow and cause excessive heat. Next, inspect the dryer vent and exhaust duct to ensure they are not blocked or crushed, which can trap hot air inside the machine. It’s also important to examine the thermostat and thermal fuse — if either part is faulty, the dryer may fail to regulate temperature properly. Make sure the dryer is not overloaded, as too many clothes can strain the system. If the issue persists, it’s best to contact a professional technician for proper diagnosis and repair.
Can software updates affect LG dryer performance and repair needs?
Software updates can affect the performance and repair needs of an LG dryer in several ways. Modern dryers often include smart technology and electronic control boards that rely on software to manage drying cycles, temperature levels, and energy efficiency. When a manufacturer releases an update, it may improve system stability, fix known bugs, or optimize drying performance. In some cases, updates can resolve minor operational issues without requiring mechanical repairs. However, if a dryer’s software becomes outdated or experiences errors, it may cause incorrect settings, longer drying times, or error codes. Regular updates and proper maintenance help ensure the dryer operates efficiently and reduce the likelihood of unnecessary repair needs over time.
How do I repair a noisy LG dryer motor?
Repairing a noisy LG dryer motor requires careful diagnosis and safety precautions. First, unplug the dryer to prevent electric shock. Remove the dryer’s back panel to access the motor and inspect it for visible debris, lint buildup, or worn parts. Often, noise is caused by a faulty motor bearing, worn drum rollers, or a loose blower wheel. Clean any lint or debris, tighten loose components, and check for signs of wear. If the motor bearings are damaged or the motor itself is defective, it usually needs replacement. Reassemble the dryer carefully and test it to ensure the noise is resolved. Regular maintenance can prevent future motor issues.
What is the cost range for professional LG dryer repair services?
How do I replace a faulty LG dryer thermostat?
How do I fix an LG dryer that won’t tumble but still heats?
Can LG dryer repair be done for all models, including compact and stackable units?
How do I replace worn drum rollers during LG dryer repair?
What maintenance steps can prevent frequent LG dryer repair?
How do I repair an LG dryer that trips the circuit breaker?
Are replacement parts for LG dryer repair widely available?
How do I troubleshoot sensor issues during LG dryer repair?
Choose APPLIANCE REPAIR in San Jose for you today and get fast, dependable service from technicians who truly care about your comfort — schedule your appointment now and restore your home’s convenience in no time.