Whirlpool repair knowledge is essential for saving you time, money, and stress when issues arise, even though Whirlpool appliances are renowned for their durability and efficiency. However, even the best machines can experience failures over time. This article aims to provide you with essential troubleshooting tips for various Whirlpool appliances, from washers to refrigerators, enabling you to identify common problems and implement effective solutions.
Many Whirlpool appliances feature advanced technology, which can sometimes lead to confusion when things don’t operate as expected. Troubleshooting provides a systematic approach to diagnosing issues, helping you avoid unnecessary service calls. By familiarizing yourself with the typical symptoms and solutions associated with Whirlpool appliances, you can enhance your problem-solving skills and maintain your appliance’s performance.
This guide will cover common failures, including electrical issues, mechanical malfunctions, and operational failures. We will discuss how to recognize these problems, potential causes, and the steps you can take to address them. Whether you’re dealing with a malfunctioning dishwasher or a stubborn dryer, this article will equip you with the knowledge needed for effective Whirlpool repair.

Whirlpool Repair: Troubleshooting Common Appliance Failures
Whirlpool appliances are known for their reliability, but occasional issues may arise. Understanding how to troubleshoot common problems can save time and money. Here are some typical appliance failures and their solutions.
Refrigerator Not Cooling
If your Whirlpool refrigerator is not cooling, check the thermostat settings. Ensure it is set to the desired temperature. Inspect the condenser coils for dirt or dust buildup, which can hinder operation. Clean them gently with a vacuum or brush. Finally, check the door seals for any wear or damage that may cause cool air to escape.
Washing Machine Not Spinning
A washing machine that refuses to spin may have an unbalanced load. Rearranging items often resolves this issue. Examine the drive belt for wear or breakage; if defective, it must be replaced. Additionally, check the lid switch to ensure it is functioning correctly; a malfunctioning switch can prevent the machine from spinning.
Dishwasher Not Draining
If water is pooling at the bottom of your dishwasher, check for clogs in the filter and drain hose. Clean these components thoroughly. Inspect the garbage disposal connection because a blockage there may also impede drainage. If the issue persists, the drain pump could be defective and may require replacement.
Oven Not Heating
When an oven does not heat up, verify the power supply first. Ensure it is plugged in and that the circuit breaker has not tripped. If the oven still doesn’t heat, inspect the heating elements for damage or signs of failure. A faulty thermostat may also cause heating issues, requiring professional diagnosis or replacement.
Dryer Not Starting
A dryer that won’t start can often be attributed to the door switch. If the switch is broken, the dryer thinks the door is open. Check the power cord for any visible damage and test the circuit breaker as well. If these preliminary checks do not yield results, the start switch or motor might need inspection or replacement.
In conclusion, regular maintenance and careful troubleshooting can prevent many Whirlpool appliance failures. By identifying and addressing these common issues, you can extend the life of your appliances and ensure they continue to operate effectively.
Identifying Common Whirlpool Appliance Issues
Whirlpool appliances are known for their reliability and efficiency, but like any mechanical device, they can experience issues over time. Identifying these problems early can save you time and money. Here are some common issues you may encounter with Whirlpool appliances and how to recognize them.
One of the most frequent problems with Whirlpool washing machines is excessive vibration or shaking during the spin cycle. This can be caused by an unbalanced load, worn-out shock absorbers, or improper installation. Check if the load is evenly distributed and inspect the suspension system for any signs of wear.
Another common issue with refrigerators is temperature inconsistency. If your refrigerator is not cooling properly, it may be due to a blocked condenser coil, faulty thermostat, or a malfunctioning compressor. Regularly cleaning the condenser coils and monitoring the thermostat settings can help maintain optimal temperatures.
In Whirlpool dishwashers, one prevalent problem is poor cleaning performance. This is often due to clogged spray arms, dirty filters, or using the wrong detergent. Ensuring that the spray arms can rotate freely and keeping the filter clean will help improve cleaning efficiency.
Whirlpool ovens can also exhibit issues such as uneven cooking or temperature fluctuations. This may result from a faulty oven sensor or a malfunctioning heating element. Checking the calibration of the oven and inspecting the heating elements can help identify the root cause of uneven cooking.
Lastly, with Whirlpool dryers, you may notice that the appliance does not heat up. This can be attributed to a clogged vent duct, blown thermal fuse, or faulty heating element. Regularly cleaning the vent and inspecting these components will help keep your dryer functioning effectively.
By being aware of these common issues and knowing how to recognize them, you can ensure that your Whirlpool appliances remain in good working condition. Regular maintenance and prompt attention to any irregularities can prevent more serious problems from developing.

Understanding Error Codes on Whirlpool Appliances
Error codes on Whirlpool appliances serve as an essential tool for diagnosing issues and facilitating repairs. Each code corresponds to specific operational problems, enabling users and technicians to identify faults quickly.
The first step in understanding these error codes is to consult the user manual for your particular appliance model, as codes may vary. However, many Whirlpool appliances, including washers, dryers, and refrigerators, use a standardized set of error codes.
For example, F02 in Whirlpool washing machines indicates a drainage issue. This means the appliance has difficulty draining fluid within the expected timeframe. Possible causes include a clogged drain hose, a malfunctioning drain pump, or a kink in the hose. Checking and cleaning these components can often resolve the issue.
On the other hand, E1 is commonly associated with Whirlpool refrigerators. It signals a problem with the temperature sensor. If this error appears, verifying the temperature settings and inspecting the sensor wiring for damage is crucial.
Another example is the LF error code on Whirlpool dishwashers, which denotes a long fill condition. This may arise from improper water supply, a clogged filter, or issues with the water inlet valve. Ensuring a steady water flow and cleaning the inlet filter can help restore normal functionality.
Understanding these codes not only assists in troubleshooting but also allows users to take timely action, reducing the risk of further damage. Document any error codes and the corresponding issues for future reference or when consulting a professional repair technician.
In summary, familiarizing oneself with error codes enhances overall appliance management. When encountering a problem, always check the manual for the specific error code to find guidance tailored to your Whirlpool appliance.
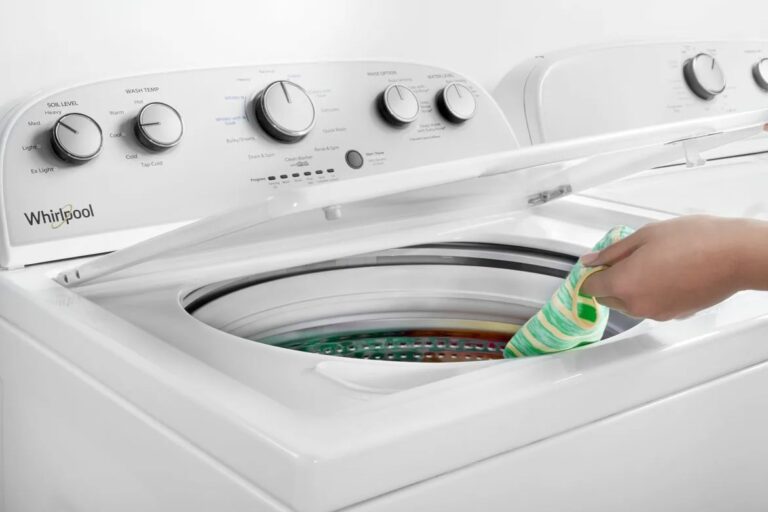
Common Symptoms of a Faulty Whirlpool Washer
Identifying issues with your Whirlpool washer can help you avoid further damage and unnecessary repairs. Several common symptoms may indicate a malfunction, allowing for timely troubleshooting.
1. Washer Won’t Start
If your washer fails to start when you press the power button, check the power supply first. Ensure the appliance is plugged in and that the circuit breaker has not tripped. If power supply issues are ruled out, inspect the door latch, as a faulty latch can prevent the machine from starting. Additionally, a malfunctioning control board or timer may also be the cause.
2. Water Leakage
Water pooling around the base of the washer can signify a more serious issue. First, check for loose or damaged hoses, as these can leak during operations. Inspect the door seal for tears or wear, as a compromised seal may permit water to escape. If these components are intact, there may be a problem with the water inlet valve or internal drum seals that requires professional assistance.
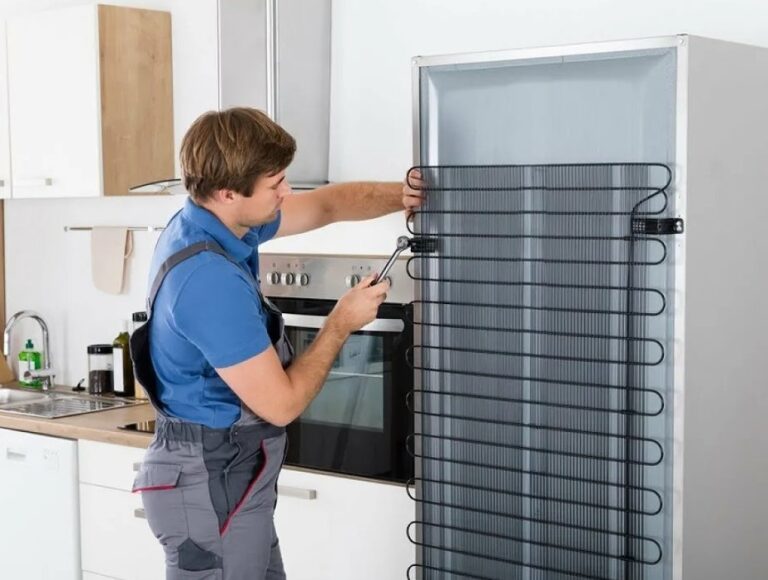
Troubleshooting Whirlpool Refrigerator Cooling Problems
When your Whirlpool refrigerator is not cooling properly, it can lead to spoiled food and increased energy consumption. To address these issues effectively, follow a systematic troubleshooting approach.
First, check the temperature settings. Ensure that the thermostat is set to the correct temperature, typically between 37°F (3°C) and 40°F (4°C) for the refrigerator compartment. If it is set too high, the unit may not cool properly.
Inspect the door seals for any visible damage or gaps. Worn or broken seals can lead to cool air escaping, resulting in ineffective cooling. Clean the seals with warm, soapy water and replace them if necessary.
Examine the condenser coils, which are usually located at the back or underneath the refrigerator. Dust and debris can accumulate on these coils, hindering the refrigerator’s ability to dissipate heat. Clean the coils with a vacuum cleaner or a coil brush to improve efficiency.
Check the air vents inside the refrigerator and freezer compartments. Make sure they are not blocked by food items. Proper air circulation is crucial for effective cooling. Rearrange items if needed to allow air to flow freely.
Listen for the sound of the evaporator fan running when the doors are closed. If it is not operating, the cooling process may be compromised. In such cases, the fan may need to be repaired or replaced.
If you notice frost buildup on the evaporator coils, this may indicate a defrost problem. Ensure that the defrost timer and heater are functioning correctly. Replace any faulty components to restore normal operation.
Additionally, check the compressor. If it is running constantly or making unusual noises, it could be a sign of failure. Consult a professional technician for diagnosis and repair of the compressor.
If all these steps do not resolve the cooling issue, the problem may lie with the refrigerant system. Low refrigerant levels can cause poor cooling. A qualified technician should handle refrigerant recharges and leaks.
Finally, if the refrigerator continues to underperform, refer to the user manual for troubleshooting advice specific to your Whirlpool model. Regular maintenance and prompt attention to any issues will help extend the life of your refrigerator.
Resolving Issues with Whirlpool Dishwasher Drainage
When your Whirlpool dishwasher fails to drain properly, it can lead to stagnant water and an unpleasant odor. Troubleshooting drainage issues involves several potential areas for inspection. Understanding common causes and solutions allows you to tackle problems effectively.
Firstly, check the drain hose. Ensure that it is not kinked or clogged. The drain hose should be positioned correctly to facilitate proper drainage. If the hose is too low or bent, it may impede water flow. Proper placement requires a minimum height to prevent backflow.
Next, inspect the drain filter. A blocked filter can trap debris, leading to drainage issues. Remove the filter carefully, clean it under running water, and reinsert it securely. Regular maintenance of the filter enhances performance and prolongs the life of your appliance.
Moreover, examine the air gap if your installation includes one. This component prevents wastewater from flowing back into the dishwasher. Ensure it is free from obstructions. If you notice water pooling around the air gap, it could indicate a clog, which should be cleared to restore proper function.
Here is a quick reference table summarizing the steps to resolve drainage issues:
| Issue | Solution |
|---|---|
| Kinked drain hose | Straighten or reposition the hose |
| Clogged drain filter | Remove and clean the filter |
| Blocked air gap | Clear any obstructions in the air gap |
| Pump failure | Check the pump for blockages and listen for unusual sounds |
Additionally, if you’ve addressed all these areas and the dishwasher still won’t drain, the problem may lie within the pump or motor assembly. Consult your user manual for specific troubleshooting tips or consider calling a professional technician for assistance. Regular maintenance practices, such as cleaning the filter and inspecting hoses, can prevent these issues from recurring and ensure your dishwasher operates efficiently.
Fixing Whirlpool Oven Heating Inconsistencies
Inconsistent heating in Whirlpool ovens can lead to uneven cooking, causing frustration. Here are steps to diagnose and fix these issues effectively.
Common causes of heating inconsistencies include:
- Faulty heating elements
- Defective thermostat
- Problems with the oven’s wiring
- Improper calibration
- Blocked vents or exhaust
Follow these troubleshooting steps to identify and resolve the issue:
- Check the Heating Elements: Inspect both the bake and broil elements for signs of damage or burn marks. If the elements appear faulty, they should be replaced.
- Test the Thermostat: Use a multimeter to check the thermostat for continuity. If it’s not functioning properly, replace it to ensure accurate temperature readings.
- Examine the Wiring: Inspect the internal wires connecting the heating elements and thermostat. Look for frayed or broken wires and repair or replace them as necessary.
- Calibrate the Oven: If the oven is consistently off by a specific temperature, adjust the calibration according to the manufacturer’s instructions. This ensures more accurate heating.
- Clear Vents: Ensure that the oven’s vents and exhaust are not blocked. Cleaning any obstructions will help improve air circulation and heating efficiency.
After performing these checks, test the oven by baking a dish at a standard temperature. Monitor the cooking results to confirm whether the heating inconsistency has been resolved. If problems persist, consider consulting a professional for a thorough inspection and repair.

Addressing Noisy Operation in Whirlpool Dryers
Noisy operation in Whirlpool dryers can be frustrating and may indicate underlying issues that need to be addressed. Common causes of noise include worn-out parts, foreign objects, or improper loading. Here’s how to troubleshoot and resolve these issues.
Common Causes of Noise
- Worn Drum Rollers: Over time, the drum rollers can wear out, leading to squeaking or grinding sounds.
- Belt Issues: A worn or damaged drive belt may cause a thumping or roaring sound during operation.
- Foreign Objects: Small items such as coins or buttons can become trapped in the dryer drum or blower wheel, creating disruptive noises.
- Loose Parts: Screws or components may loosen over time, resulting in rattling or banging sounds.
Troubleshooting Steps
- Inspect the Drum: Open the dryer door and manually spin the drum. Listen for any unusual sounds and check for smooth rotation.
- Examine the Rollers: Remove the belt and inspect the drum rollers for wear or damage. Replace if necessary.
- Check for Foreign Objects: Inspect the drum and lint filter for any trapped items. Clear any obstructions carefully.
- Tighten Loose Parts: Check all screws and fasteners within the dryer. Tighten any that are loose to prevent rattling.
If the noise persists after following these steps, consider consulting a professional technician for a comprehensive diagnosis and repair. Regular maintenance can also help prevent future noise issues and prolong the lifespan of your Whirlpool dryer.
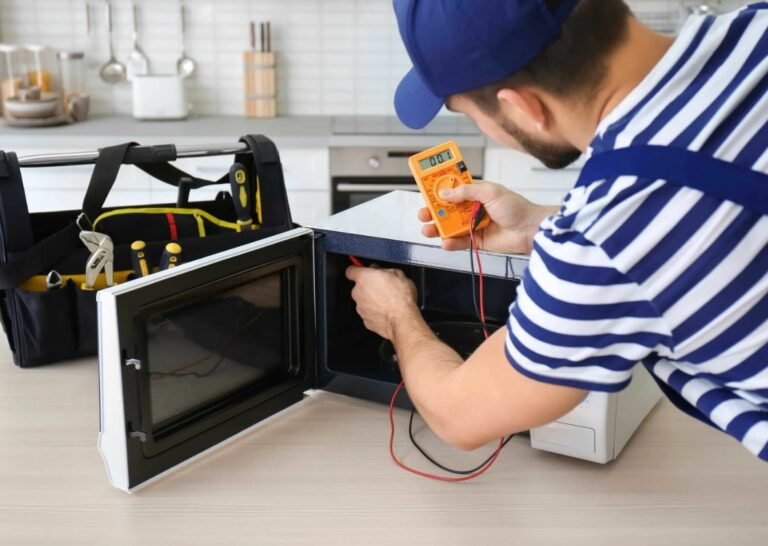
Dealing with Whirlpool Microwave Power Failures
Power failures in Whirlpool microwaves can be frustrating, but understanding common causes and troubleshooting steps can help restore functionality. If your microwave isn’t turning on or displaying signs of life, follow these guidelines to diagnose and potentially resolve the issue.
Initial Checks
The first step in dealing with power failure is to check the power source. Ensure the microwave is plugged in securely. Sometimes, a loose connection can prevent the microwave from receiving power. If the plug is secure and the appliance still does not operate, inspect the circuit breaker or fuse box. A tripped breaker or blown fuse may disable the power supply to the microwave.
Additionally, try plugging a different appliance into the same outlet to confirm whether the outlet is functioning properly. If the alternate appliance works, then the issue lies within the microwave rather than the power source.
Internal Components to Inspect
If initial checks do not reveal a problem, the issue may reside within the microwave itself. One common cause of power failures is a faulty door switch. The microwave will not operate if the door is not securely closed or if the door switch fails. To assess this, examine the door for any visible defects and listen for a click when the door is closed. If the switch is malfunctioning, it will require replacement.
Another component to evaluate is the internal fuse. Microwaves contain fuses that protect against electrical surges. If this fuse is blown, the microwave will not power on. Consult the user manual for location details and consider replacing the fuse if necessary. Ensure that you disconnect the microwave from the power source before performing any repairs to avoid electric shock.
If after these checks the microwave still fails to operate, it may indicate a more serious internal failure, such as a malfunctioning power supply circuit or control board. In such cases, seeking professional assistance is recommended as these components require expert handling and repair.
By performing these initial checks and inspections, many power-related issues with Whirlpool microwaves can be identified and resolved without extensive intervention. Regular maintenance and attention to detail can also help prevent future occurrences of power failures.
Inspecting Whirlpool Ice Maker Malfunctions
Whirlpool ice makers can experience various malfunctions that hinder their performance. When troubleshooting these issues, it is crucial to systematically inspect the components of the ice maker to identify the root cause. This guide outlines common areas to check for faults.
Checking Power Supply and Connections
Start by ensuring that the ice maker is receiving power. Verify that the appliance is plugged in and that the outlet is functioning. A tripped circuit breaker or blown fuse may also be the culprit. Additionally, inspect the wiring connections for any signs of damage, corrosion, or loose connections that could disrupt power flow.
Assessing Water Supply and Valves
The ice maker requires an adequate water supply to produce ice. Inspect the water inlet valve and ensure it is not clogged or malfunctioning. Check for any kinks or blockages in the water line. If the water supply is interrupted, the ice maker will not function correctly. Listen for sounds indicating that the valve is opening; if you hear no sound, the valve may need replacement.
Another common issue is a frozen water line, which can prevent water from reaching the ice maker. If a freeze is suspected, defrost the ice maker and the water line to restore proper function.
If you’ve checked the power and water supply but the ice maker still isn’t operating, consider inspecting the ice maker’s internal components, such as the ice mold thermostat and the control module, which may require professional assistance for servicing or replacement.
Steps to Repair a Whirlpool Garbage Disposal
Repairing a Whirlpool garbage disposal can often be a straightforward process if you follow the correct steps. Here is a guide to help you identify and resolve common issues.
1. Safety First
Before starting any repair work, ensure the garbage disposal is unplugged or the circuit breaker is turned off to avoid electric shock. Use gloves to protect your hands from sharp objects or potential injuries.
2. Troubleshooting the Issue
Begin by identifying the problem. Common issues include:
- Disposal not running
- Unusual noises during operation
- Clogs and jams
- Bad odors
Check for any visible jams by looking inside the disposal with a flashlight. If there are any objects lodged inside, remove them with tongs or pliers.
3. Resetting the Disposal
If the disposal is not running, locate the reset button on the bottom of the unit. Press this button to reset the mechanism. After resetting, try running the disposal again.
4. Checking the Power Supply
If the unit still does not work, check the power supply. Ensure that the circuit breaker is functioning and that the unit is plugged in properly. If necessary, replace any blown fuses or reset tripped breakers.
5. Fixing Clogs
If your disposal is making a humming noise but not functioning, it may be jammed. Use an Allen wrench to manually turn the flywheel from the bottom of the disposal. This can help dislodge any stuck objects. After doing so, turn the power back on and test the unit.
6. Addressing Bad Odors
To eliminate unpleasant smells, run cold water through the disposal while grinding ice cubes or citrus peels. This helps clean the inner components and refresh the unit. Additionally, you can use baking soda followed by vinegar to neutralize odors.
7. Testing and Final Steps
After completing repairs, run the disposal with water to check for proper operation. Observe for any leaks and listen for unusual sounds. If issues persist after following these steps, it may be time to consult a professional repair technician.
By adhering to these steps, you can effectively troubleshoot and repair your Whirlpool garbage disposal, ensuring its optimal performance for your kitchen.
Finding Solutions for Whirlpool Range Burners Not Igniting
If your Whirlpool range burners are not igniting, it can be frustrating. However, there are several steps you can take to diagnose and fix the issue effectively. Below are common causes and solutions to help you troubleshoot the problem.
Common Causes
- Clogged Burner Ports: Food debris and grease can block the burner ports, preventing ignition.
- Faulty Igniter: A malfunctioning igniter may fail to produce the necessary spark to ignite the gas.
- Gas Supply Issues: There may be a problem with the gas supply, such as a closed valve or empty tank.
- Electrical Problems: Loose or damaged wiring can disrupt the ignition system.
- Control Settings: The stove settings may not be correctly adjusted for ignition.
Troubleshooting Steps
- Check the Gas Supply: Ensure that the gas valve is open and there is no obstruction in the gas line.
- Examine the Igniter: Inspect the igniter for cracks or damage. Test it to see if it sparks when you turn the burner on.
- Clean Burner Ports: Use a small brush or toothpick to clear any food debris from the burner ports.
- Inspect Electrical Connections: Examine wiring for damages or loose connections. Tighten any loose wires.
- Adjust Control Settings: Confirm that the burner control knobs are set to the ‘Lite’ position when attempting to ignite.
- Test Other Burners: If other burners ignite without issues, the problem may be localized to one specific burner.
If these troubleshooting steps do not resolve the issue, it might be advisable to consult a professional technician for further assistance. Always ensure that you take safety precautions when dealing with gas and electrical appliances.
Q&A — Whirlpool repair:
What are the common signs that my Whirlpool appliance needs repair?
Common signs that indicate your Whirlpool appliance may need repair include unusual noises during operation, inability to heat or cool properly, leaks, error codes displayed on the control panel, and failure to start altogether. For example, if your refrigerator is making a loud buzzing sound or your washing machine is not spinning, these could be signs of mechanical or electrical issues requiring attention.
How can I troubleshoot my Whirlpool washing machine if it won’t start?
If your Whirlpool washing machine won’t start, begin by checking the power supply. Ensure it is plugged in and that the outlet is functioning. Next, inspect the door latch; many models won’t operate if the door isn’t securely closed. Additionally, check for any error codes on the display, as these can provide insight into the issue. If these steps don’t resolve the problem, consider reviewing the user manual for troubleshooting specific to your model.
What should I check if my Whirlpool refrigerator is not cooling properly?
When your Whirlpool refrigerator is not cooling adequately, you should first inspect the temperature settings to ensure they are correctly set. Next, make sure the vents inside the refrigerator are not blocked by food items, which can restrict airflow. Also, look for any frost buildup on the back wall—this could indicate a problem with the defrost system. If these checks don’t solve the issue, it may be necessary to examine the condenser coils for dust accumulation or consider contacting a professional for further diagnosis.
Is it worth it to attempt repairs on my Whirlpool appliance myself?
Deciding whether to attempt repairs on your Whirlpool appliance yourself depends on your comfort level with basic troubleshooting and appliance repair. Simple tasks—like replacing a door seal or unclogging a drain—can often be done without professional help. However, if the problem involves complex electrical components or refrigerants, it’s safer to hire a qualified technician. Assess the issue and your knowledge before making a decision, as some repairs could lead to further damage if not handled properly.
What are the steps for cleaning the filter on my Whirlpool dishwasher?
Cleaning the filter on your Whirlpool dishwasher is relatively straightforward. Start by removing the bottom rack to access the filter; depending on your model, you may need to twist or lift the filter out. Rinse the filter under warm water to remove any food particles or debris. Use a soft brush if needed for stubborn grime. Once clean, place the filter back into its original position and replace the bottom rack. Regular cleaning helps maintain the dishwasher’s performance and can prevent clogging.
Looking for trusted APPLIANCE REPAIR in San Jose for you? Our certified technicians offer fast, affordable, and reliable fixes for all your home appliances — because your time and comfort matter most!