LG refrigerator repair knowledge can save you time and money when your appliance begins to falter, preventing spoiled groceries and inconvenience. Refrigerators play a vital role in our daily lives, preserving food and maintaining freshness. Understanding the common issues and repair techniques is the key to quickly restoring full functionality.
This article provides essential tips for diagnosing and fixing cooling problems in your LG refrigerator. From checking the temperature settings to inspecting the condenser coils, you’ll gain insights into effective troubleshooting methods. With a little effort and knowledge, you can restore your fridge’s cooling performance and ensure it operates efficiently.
Whether you’re dealing with a complete cooling failure or fluctuating temperatures, knowing the right steps to take is crucial. Stay tuned as we outline practical advice and necessary precautions, empowering you to tackle common refrigerator issues confidently.

LG Refrigerator Repair: Essential Tips to Restore Cooling Performance
Proper maintenance of your LG refrigerator is crucial to ensure its cooling performance remains optimal. If you notice a decrease in cooling efficiency, follow these essential tips to diagnose and restore functionality.
1. Check the Temperature Settings: Ensure that your refrigerator’s temperature is set to the recommended levels, typically between 35°F and 38°F (1°C to 3°C) for the refrigerator and 0°F (-18°C) for the freezer. Adjusting these settings can drastically improve cooling.
2. Clean the Condenser Coils: Dust and debris can accumulate on the condenser coils, reducing efficiency. Unplug the refrigerator and gently vacuum or brush the coils located at the back or beneath the unit. This should be done at least twice a year.
3. Inspect the Door Seals: Worn or damaged door seals can cause cold air to escape, leading to increased energy consumption and cooling issues. Check for any cracks or tears and replace seals as needed to maintain a tight seal.
4. Ensure Proper Airflow: Overcrowding the refrigerator can obstruct airflow. Keep items organized and avoid blocking vents inside the refrigerator and freezer to allow cold air to circulate freely.
5. Defrost the Freezer: If your freezer is frost-covered, it can hinder cooling performance. Manually defrosting the freezer can help restore normal function. Ensure the appliance is turned off during this process.
6. Test the Fan and Compressor: Listen for the sound of the fan and compressor while the refrigerator is running. If either component is making strange noises or not operating, they may need repair or replacement. Consult a professional for service if needed.
7. Regular Maintenance: Routine check-ups can prevent future issues. Schedule inspections with a certified technician to ensure all components are in good working condition, reducing the likelihood of breakdowns.
By following these tips, you can enhance the cooling performance of your LG refrigerator and extend its lifespan. If issues persist, consider reaching out to a certified appliance repair technician for further assistance.
Identifying Common Cooling Issues in LG Refrigerators
When your LG refrigerator fails to maintain the proper temperature, it can lead to food spoilage and increased energy consumption. Here are some prevalent cooling issues and how to identify them.
Inadequate Air Circulation
One of the primary reasons for insufficient cooling is poor air circulation. This can occur due to blocked vents or a malfunctioning fan. Check the air vents inside the refrigerator and freezer compartments to ensure they are not obstructed by food items. Additionally, listen for the sound of the fan when the refrigerator is running; if it is silent, the fan may need repair or replacement.
Temperature Setting Issues
Another common issue arises from incorrect temperature settings. If the temperature control is set too high, it can cause the refrigerator to cool inadequately. Make sure to adjust the temperature settings according to the manufacturer’s recommendations. Also, verify that the thermostat is functioning properly by testing the actual internal temperature with a thermometer.
Identifying and addressing these cooling issues promptly can enhance the performance of your LG refrigerator and prolong its lifespan.

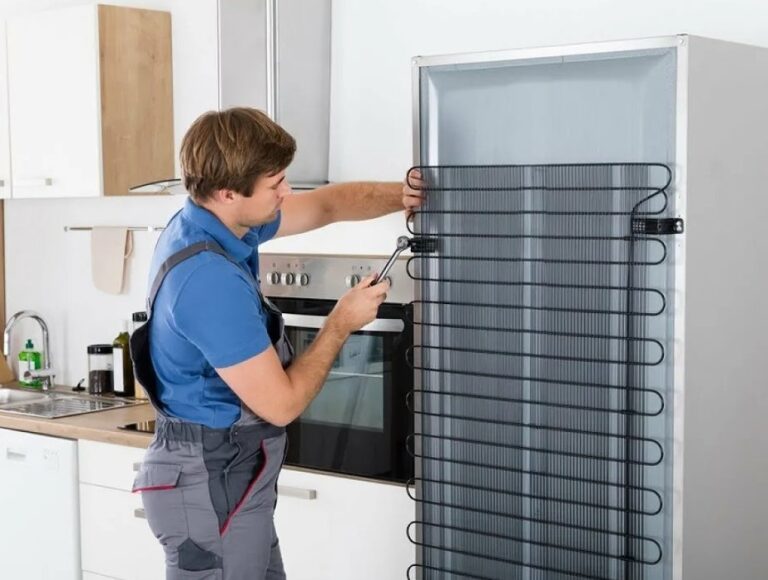
Checking and Cleaning the Condenser Coils
Condenser coils are essential components of your LG refrigerator, responsible for dissipating heat absorbed from the interior. If these coils become dirty or obstructed, your refrigerator’s cooling performance may suffer significantly. Regular maintenance of the condenser coils can enhance efficiency and prolong the appliance’s lifespan.
To start, locate the condenser coils, which are typically found either at the back or beneath the refrigerator. Depending on the model, you may need to pull the appliance away from the wall for easier access. Make sure to unplug the refrigerator before beginning any cleaning to ensure safety.
Next, evaluate the condition of the coils. Look for dust, dirt, pet hair, and debris that may have accumulated over time. A soft brush or a vacuum cleaner with a brush attachment can be used to gently remove the buildup. Ensure you reach all accessible areas, as even small obstructions can impair the cooling efficiency.
| Steps for Checking and Cleaning | Description |
|---|---|
| 1. Unplug the Refrigerator | Safety first: ensure the appliance is disconnected from power before any maintenance. |
| 2. Locate the Coils | Find the condenser coils either at the back or bottom of the unit. |
| 3. Inspect for Dirt | Look for visible dirt and debris that might hinder performance. |
| 4. Use a Brush or Vacuum | Gently remove any buildup without damaging the coils. |
| 5. Clean Surrounding Area | Ensure the area around the coils is also clean to allow for proper airflow. |
| 6. Plug In the Refrigerator | Reconnect to power and monitor the cooling performance. |
For optimal performance, it is advisable to clean the condenser coils every six months. If you live in a particularly dusty environment or have pets, more frequent cleaning may be necessary. Keeping these coils clean not only enhances cooling efficiency but also reduces energy consumption, contributing to lower utility bills.
By following these steps, you ensure that your LG refrigerator operates smoothly and efficiently, maintaining its cooling performance and extending its operational life.
Assessing the Door Seals for Proper Closure
Door seals, or gaskets, play a critical role in maintaining the cooling performance of your LG refrigerator. A compromised seal can lead to temperature fluctuations and increased energy consumption. It is essential to regularly assess the condition of these seals to ensure they are functioning effectively.
Visual Inspection
Begin by visually inspecting the door seals for any signs of damage. Look for cracks, tears, or deformations that may prevent a proper closure. Pay close attention to the corners and edges, as these areas are more prone to wear and tear. When the seals appear discolored or sticky, it indicates deterioration and requires immediate attention.
Functional Test
To confirm that the seals are functioning correctly, perform a simple functional test. Close the refrigerator door and try sliding a piece of paper between the seal and the refrigerator frame. If the paper slides out easily, it suggests that the seal is not tight enough and air may be escaping. Repeat this test in various locations around the seals to identify any weak spots. Adjusting or replacing the seals may be necessary to restore proper closure and cooling efficiency.
Understanding the Role of the Thermostat in Cooling
The thermostat plays a crucial role in maintaining the cooling performance of an LG refrigerator. This component is responsible for regulating the internal temperature by controlling the compressor’s operation. When the temperature inside the refrigerator rises above the set point, the thermostat signals the compressor to start, allowing refrigerant to circulate and cool the interior.
A properly functioning thermostat ensures that the refrigerator maintains a consistent temperature, preventing food spoilage and maintaining energy efficiency. If the thermostat is faulty or improperly calibrated, it may lead to temperature fluctuations, resulting in either overcooling or insufficient cooling, both of which can compromise food safety and the appliance’s performance.
It’s essential to regularly check the thermostat settings and their accuracy. Users can verify the thermostat’s functionality by using a separate thermometer to compare the internal temperature with the set temperature. If discrepancies are found, recalibration or replacement of the thermostat may be necessary to restore proper cooling performance.
Additionally, dust and debris accumulation around the thermostat can interfere with its readings. Keeping the area clean and free of obstructions can enhance its operational efficiency. Regular maintenance can help prevent issues related to the thermostat and prolong the lifespan of the refrigerator.
Inspecting the Evaporator Fan for Obstructions
The evaporator fan is a critical component in maintaining the cooling performance of your LG refrigerator. It circulates cold air throughout the refrigerator and freezer compartments. An obstruction in the evaporator fan can restrict airflow, leading to inadequate cooling. To ensure optimal performance, inspecting the fan for obstructions is essential.
Begin by unplugging the refrigerator to ensure safety during inspection. Next, locate the evaporator fan, typically found behind the back panel in the freezer section. Carefully remove this panel to gain access to the fan.
Once exposed, visually inspect the fan for any debris, such as ice buildup, food particles, or dust. These obstructions can impede the fan’s operation and reduce its efficiency. If you notice ice accumulation, it may indicate a defrost issue that needs addressing. Clean any debris with a soft brush or a cloth, being cautious not to damage the fan blades.
Additionally, check the fan blades for any signs of damage or warping, as these can affect the fan’s ability to spin freely. Manually spin the fan to ensure it rotates without resistance. If the fan does not turn easily or makes unusual noises, it may need replacement.
After clearing any obstructions, reassemble the back panel and plug the refrigerator back in. Monitor the cooling performance over the next few days to confirm that the issue has been resolved. Regularly inspecting the evaporator fan can prevent future cooling problems and prolong the lifespan of your appliance.
Testing the Compressor and Its Functionality
The compressor is a crucial component of your LG refrigerator’s cooling system. It pumps refrigerant throughout the system, making it essential for maintaining optimal cooling performance. If your refrigerator is not cooling properly, testing the compressor is a necessary step in diagnosing the issue.
Steps to Test the Compressor
- Unplug the Refrigerator: Always disconnect the appliance from the power source before performing any tests to ensure safety.
- Locate the Compressor: The compressor is typically found at the back of the refrigerator. Remove the cover panel if necessary.
- Visual Inspection: Check for any visible signs of damage or wear, such as burnt areas or leaks.
- Listen for Unusual Noises: When plugged back in, listen for any abnormal sounds like rattling or continuous clicking, which may indicate a malfunction.
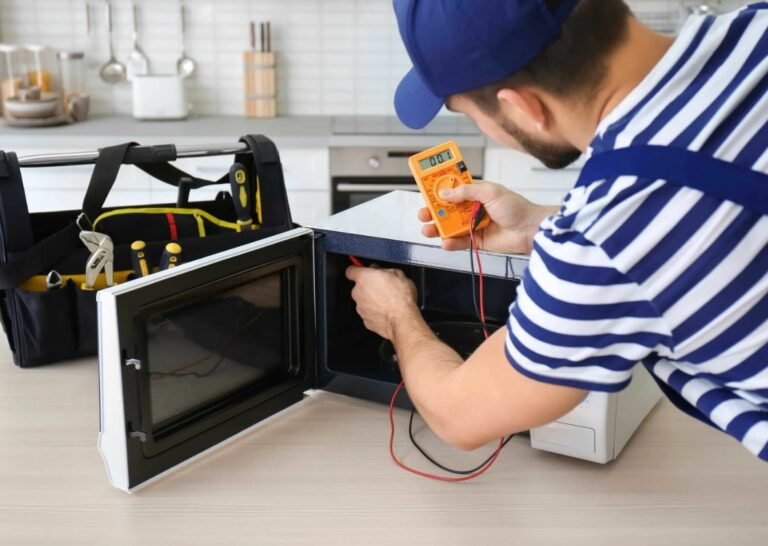
- Use a Multimeter: Set the multimeter to the ohms setting. Disconnect the terminals from the compressor and test for continuity. A reading of zero indicates a short, while infinite resistance suggests an open circuit.
Understanding Compressor Functionality
When the compressor operates correctly, it should cycle on and off within certain intervals. If it runs continuously without shutting off, it may indicate a refrigeration issue or a fault in the thermostat. Conversely, sporadic operation may suggest inadequate refrigerant levels or blockages in the system.
Remember that the compressor should not become overly hot to the touch; excessive heat is often a sign of compressor failure. If after performing these tests you find that the compressor is faulty, it may be time to consult a professional technician for repairs or replacement.
Evaluating the Temperature Settings for Optimal Performance
Maintaining the correct temperature settings in your LG refrigerator is crucial for ensuring optimal cooling performance. Incorrect settings can lead to food spoilage or excessive energy consumption.
Here are steps to evaluate and adjust temperature settings:
- Check the Recommended Settings:
- Most LG refrigerators should be set at 37°F (3°C) for the refrigerator compartment.
- The freezer compartment typically works best at 0°F (-18°C).
- Use a Refrigerator Thermometer:
- Place a thermometer in both the refrigerator and freezer compartments.
- Leave it for several hours to get an accurate reading.
- Adjust the Temperature Settings:
- If the temperatures are not within the recommended range, locate the temperature control dial or digital display.
- Gradually adjust the settings, allowing time for the temperature to stabilize (usually 24 hours).
- Monitor Consistently:
- Check the thermometer regularly, especially after adjusting settings.
- Make adjustments if necessary, based on seasonal temperature changes or refrigerator load.
By evaluating and adjusting the temperature settings correctly, you can help ensure your LG refrigerator operates effectively and maintains its cooling performance, reducing food spoilage and optimizing energy use.
Verifying the Drain Pan and Its Maintenance
The drain pan is an essential component of your LG refrigerator’s cooling system, aiding in water drainage that accumulates from condensation. Proper maintenance of the drain pan can significantly enhance your refrigerator’s performance and longevity.
Steps to Verify the Drain Pan
To ensure that the drain pan is functioning correctly, follow these steps:
- Locate the drain pan, usually positioned at the bottom of the refrigerator or near the compressor.
- Remove the pan carefully, checking for any cracks or damage that may cause leaks.
- Inspect for accumulated debris or sediment that could obstruct drainage.
- Clean the drain pan with warm, soapy water to remove any residue, then rinse thoroughly and dry.
Maintenance Tips for the Drain Pan
Regular maintenance ensures the drain pan operates efficiently. Follow these tips:
- Check the drain pan monthly for cleanliness and signs of wear.
- Ensure that the refrigerator is level, as an uneven unit can cause water to collect improperly.
- Inspect the drainage system for clogs; a clear drain line is critical for optimal function.
- Replace the drain pan if you find significant damage or if it cannot hold water adequately.
| Issue | Solution |
|---|---|
| Cracked Drain Pan | Replace with a new drain pan. |
| Clogged Drain Line | Use a flexible brush or vacuum to clear the blockage. |
| Dirty Drain Pan | Clean with warm soapy water regularly. |
| Uneven Refrigerator | Adjust the leveling feet to ensure stability. |
By regularly verifying and maintaining the drain pan, you can prevent larger issues in your LG refrigerator, ensuring efficient cooling and prolonging its lifespan.

Replacing Faulty Light Bulbs Without Professional Help
Replacing faulty light bulbs in your LG refrigerator is a simple task that can enhance its efficiency and functionality. By ensuring proper lighting, you can easily locate food items and monitor your fridge’s internal conditions. Here’s a straightforward guide to assist you in the process.
Begin by unplugging your refrigerator to ensure your safety while working. This eliminates any risk of electric shock. After disconnecting the power, open the refrigerator door to access the light fixture. Depending on the model, you may find a plastic cover over the bulb. If present, gently pry it off using your fingers or a flathead screwdriver, taking care not to damage the surrounding area.
Once the cover is removed, check the type of bulb installed. Most LG refrigerators use standard light bulbs, but it’s essential to confirm this. If the bulb is still intact, it’s a good idea to wear gloves to prevent oil from your fingers transferring to the new bulb. Carefully twist the old bulb counterclockwise to remove it from the socket.
Before installing the new bulb, inspect the socket for any signs of damage or corrosion, as this could affect functionality. If everything appears fine, take your new bulb, ensuring it is the correct wattage and type specified in your refrigerator’s manual. Insert the new bulb into the socket and twist it clockwise until it’s secure.
Replace the plastic cover if your model utilizes one, ensuring it fits snugly. With the bulb successfully changed, plug the refrigerator back into the power outlet. Allow the light to illuminate, confirming that the replacement was successful.
Finally, monitor the new bulb over the next few days to ensure consistent performance. If the light flickers or does not function, revisit the socket to check for loose connections or consider replacing the bulb again, as faulty units can occur occasionally.
Recognizing Warning Signs of Refrigerant Leaks
Refrigerant leaks in LG refrigerators can lead to inefficient cooling and increased energy costs. Recognizing the early warning signs is critical to preventing further damage. Here are key indicators that there may be a refrigerant leak in your appliance:
Common Symptoms
- Inadequate Cooling: If your refrigerator is not maintaining the proper temperature, it could be a sign of insufficient refrigerant levels.
- Frost Build-Up: Excessive frost accumulation on the evaporator coils may indicate a refrigerant leak, causing the coils to freeze.
- Unusual Hissing or Bubble Sounds: A hissing noise may indicate refrigerant escaping from the system. Listen for any unusual sounds when the refrigerator is running.
- Increased Energy Bills: A sudden spike in energy costs can suggest that the refrigerator is working harder due to a coolant deficiency.
Visual Indicators
- Oil Stains: Refrigerants often carry oil. If you notice these stains around the unit, it might be indicative of a refrigerant leak.
- Ice Patches: Look for ice formations inside the fridge or on the cooling coils. This may signal a problem with the refrigerant.
- Puddles of Liquid: Any unusual puddling or dripping around the fridge should be investigated, as it could be refrigerant leaking.
Identifying these symptoms early on can help avoid costly repairs and ensure your LG refrigerator operates efficiently. If any of these warning signs are present, it is advisable to consult a professional technician for a thorough assessment and necessary repairs.
Utilizing Diagnostic Tools for Accurate Troubleshooting
When facing cooling issues with your LG refrigerator, employing diagnostic tools can significantly enhance troubleshooting efficiency. These tools help pinpoint the exact cause of the problem, reducing guesswork and potentially saving time and money on repairs.
Types of Diagnostic Tools
Several diagnostic tools can be utilized, including multimeters, temperature probes, and specialized appliance diagnostic software. A multimeter is essential for checking electrical components such as the compressor, fan motors, and temperature sensors. By measuring voltage and resistance, you can determine if these parts are functioning correctly.
Temperature probes, on the other hand, allow you to monitor internal temperatures accurately. This data is vital for assessing whether the refrigerator is adequately cooling food items. Additionally, appliance diagnostic software can run tests and check error codes, providing insights directly from the refrigerator’s control system.
Implementing Diagnostic Tools
To effectively utilize these tools, start by conducting visual inspections for obvious signs of wear or damage. Next, use the multimeter to test the compressor’s electrical supply and check for continuity in the fan motors. If any components exhibit irregular readings, they may need replacement.
Simultaneously, place a temperature probe inside the refrigerator and freezer compartments to track temperature fluctuations over a period of time. If temperatures remain above the manufacturer’s specifications, further investigation into airflow, door seals, and refrigerant levels may be necessary.
By integrating these diagnostic tools into your repair process, you can achieve a more accurate assessment of your LG refrigerator’s cooling performance and effectively address the underlying issues. This proactive approach not only restores functionality but can also prolong the appliance’s lifespan.
Maintaining Proper Airflow Inside the Refrigerator
Proper airflow is crucial for the efficient functioning of your LG refrigerator. A well-ventilated interior ensures that cold air circulates evenly throughout the appliance, maintaining consistent temperatures and preventing food spoilage. Here are key tips for maintaining optimal airflow inside your refrigerator.
Organize Food Placement
To promote efficient airflow, avoid overcrowding your refrigerator. Ensure that there is enough space between items to allow cold air to circulate. Do not block vents located on the back and sides of the fridge with large items. Group similar foods together, and place items that need colder temperatures, such as meats, on the lower shelves where temperatures are typically more consistent.
Regularly Clean and Maintain Components
Dust and debris can obstruct vents and fans, impairing airflow. Regularly clean the condenser coils located at the back or beneath the refrigerator to ensure efficient heat exchange. Additionally, check the door seals for any damage or dirt, as compromised seals can lead to temperature fluctuations and increased energy consumption. Maintaining clean and functional seals will help keep cool air contained within the refrigerator.
Q&A — LG refrigerator repair :
What are the common signs that my LG refrigerator needs repair?
Some common signs that indicate your LG refrigerator may need repair include rising temperatures inside the fridge and freezer compartments, unusual noises such as rattling or buzzing, leaks or puddles of water beneath the appliance, ice buildup in the freezer, and failure of lights or temperature displays. If you notice any of these issues, it may be time to investigate further or consult a repair technician.
How can I troubleshoot my LG refrigerator before calling a technician?
You can try several troubleshooting steps before contacting a professional. First, check the power supply; make sure the refrigerator is plugged in and the outlet is functioning correctly. Next, inspect the temperature settings and ensure they are set properly. Clean the condenser coils, as dirt buildup can affect cooling. Additionally, make sure the door seals are intact and not allowing cold air to escape. If these steps do not resolve the issue, consider reaching out to a technician.
What should I do if my LG refrigerator is making strange noises?
If you hear strange noises from your LG refrigerator, it may indicate an issue that needs attention. First, listen closely to determine the type of noise; for example, buzzing could suggest a problem with the compressor, while rattling might be caused by loose parts. Ensure that the refrigerator is level and that nothing is obstructing the fan. If noise persists after these checks, it may be best to consult a repair professional who can diagnose and fix the problem.
How often should I perform maintenance on my LG refrigerator?
Regular maintenance is important for keeping your LG refrigerator running smoothly. It’s advisable to clean the condenser coils at least twice a year, as dust and debris can impair performance. Additionally, check the door seals periodically to ensure they are airtight. You should also inspect and replace the water filter according to the manufacturer’s recommendations. These simple tasks can help extend the life of your appliance and maintain its cooling efficiency.
Can I fix my LG refrigerator myself, or should I hire a professional?
Your ability to fix your LG refrigerator yourself largely depends on the nature of the issue. Minor problems like cleaning the condenser coils or replacing the water filter can typically be handled without professional assistance. However, if you encounter complex issues such as a malfunctioning compressor or electrical problems, it is advisable to hire a professional technician. Attempting to repair complicated systems without the right knowledge can lead to further damage or safety risks.
What are the common signs that indicate my LG refrigerator needs repair?
There are several signs that may suggest your LG refrigerator requires repair. One common indicator is inconsistent cooling, where certain areas of the fridge are warm or the temperature fluctuates. Another sign is unusual noises, such as loud hums or clattering sounds, which might indicate a problem with the compressor or fan. If you notice water pooling on the floor or within the fridge, it could indicate a clogged defrost drain or a faulty seal. Additionally, if the refrigerator’s light is not functioning or if you detect a strange odor, these can also be signs that maintenance is needed.
How can I troubleshoot my LG refrigerator before calling for professional help?
Before reaching out to a repair service, there are several troubleshooting steps you can take. First, check if the refrigerator is plugged in and the outlet is functioning by testing it with another device. Inspect the door seals for any gaps that could affect cooling efficiency; clean them if they appear dirty. Next, ensure that the thermostat is set to the correct temperature and hasn’t been accidentally changed. You might also want to clean the condenser coils, usually located at the back or underneath the appliance, as dust buildup can hinder performance. If these measures do not resolve the issue, then it might be time to consult a professional technician for a deeper diagnosis.
Looking for trusted APPLIANCE REPAIR in San Jose for you? Our certified technicians offer fast, affordable, and reliable fixes for all your home appliances — because your time and comfort matter most!