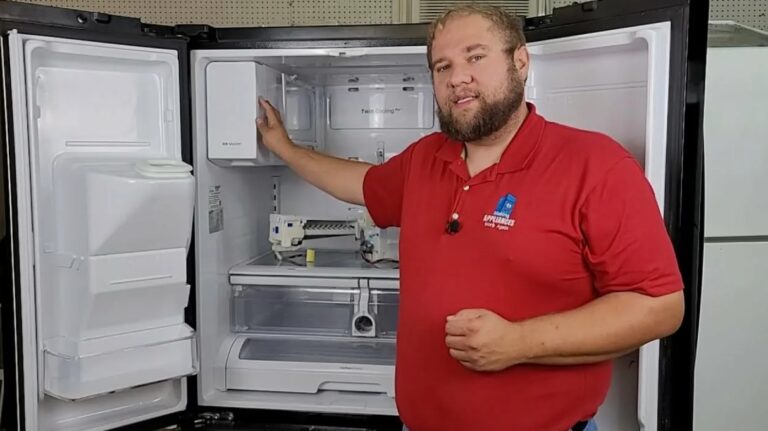
Sub Zero refrigerator repair services come into play when issues arise, even though these appliances stand out in the realm of premium home appliances for their exceptional quality and innovative technology. They are engineered not only to preserve the freshness of your food but also to enhance the aesthetics of your kitchen. However, like any sophisticated appliance, they are not immune to issues over time. Expert repair requires specialized knowledge and skill to address a variety of problems.
The importance of timely maintenance and repair cannot be overstated when it comes to Sub Zero refrigerators. These systems are designed with advanced cooling capabilities, and a malfunction can lead to significant food spoilage and increased energy costs. Recognizing the signs of a malfunction early can save you time and money, ensuring that your refrigerator continues to function at its best.
Expert technicians understand the intricacies of Sub Zero models and are equipped with the necessary tools and original replacement parts to conduct repairs effectively. Whether it’s a cooling failure, unusual noises, or temperature inconsistencies, specialized repair services provide not only swift solutions but also preventative measures, ensuring the longevity of your appliance.
In this article, we will explore common issues faced by Sub Zero refrigerators, the benefits of professional repair services, and tips for maintaining your cooling system to ensure optimal performance. With the right care, your Sub Zero refrigerator will continue to serve you faithfully for years to come.
Sub Zero Refrigerator Repair: Expert Care for Premium Cooling Systems
Sub Zero refrigerators are renowned for their exceptional quality and innovative technology, making them a top choice for discerning homeowners. These premium cooling systems are designed to preserve the freshness of food and maintain an ideal environment for perishable items. However, like any advanced appliance, Sub Zero refrigerators may require expert repair and maintenance to ensure they operate at peak efficiency.
Common Issues and Expert Solutions
Despite their durability, Sub Zero refrigerators can encounter a variety of issues. Common problems include temperature fluctuations, unusual noises, and coolant leaks. Professionals trained in Sub Zero repair possess in-depth knowledge of these models, enabling them to diagnose and resolve issues quickly. For example, if the refrigerator fails to maintain the desired temperature, technicians will check the compressor, evaporator, and condenser to identify potential faults. Timely intervention is crucial to prevent food spoilage and preserve the longevity of the unit.
Importance of Professional Maintenance
Regular maintenance is essential for extending the lifespan of Sub Zero refrigerators. Professional service includes cleaning condenser coils, checking seals, and calibrating temperature settings. Skilled technicians recommend scheduling annual maintenance to minimize the risk of unexpected breakdowns. Investing in expert care not only enhances performance but also retains the unit’s value over time. By trusting repairs and maintenance to certified specialists, homeowners can ensure that their Sub Zero refrigerator continues to deliver exceptional cooling results for years to come.
Identifying Common Issues with Sub Zero Refrigerators
Sub Zero refrigerators are known for their premium quality and exceptional performance. However, like any appliance, they can experience issues over time. Understanding common problems can help you identify when your unit may need professional attention.
Temperature Fluctuations
One of the most common issues with Sub Zero refrigerators is temperature fluctuations. If you notice that your food is spoiling faster than usual or ice is melting in the freezer, it may indicate a problem with the thermostat or condenser. A malfunctioning thermostat can lead to inaccurate temperature readings, while a blocked condenser can prevent proper cooling efficiency. Regular maintenance is essential to avoid this issue, including cleaning the condenser coils and ensuring adequate airflow around the appliance.
Strange Noises
Unusual sounds coming from your refrigerator can signal various underlying issues. If you hear a loud buzzing or rattling noise, it might be caused by a malfunctioning fan or compressor. The evaporator fan ensures even cooling by circulating air, while the compressor is responsible for refrigerant flow. If these components fail, they may produce abnormal noises. Promptly addressing these sounds can prevent further damage to your refrigerator.
Essential Tools for DIY Sub Zero Refrigerator Repairs
Repairing a Sub Zero refrigerator requires specific tools to ensure effective and safe maintenance. Having the right tools can make a significant difference in the repair process, leading to quicker resolutions and preventing further damage.
Basic Hand Tools
Start with a set of basic hand tools. A screwdriver set with both flathead and Phillips head options is essential for accessing various components of the refrigerator. Pliers, including needle-nose pliers, help grip and manipulate small parts. A wrench set is crucial for loosening or tightening nuts and bolts that hold critical components together. Additionally, a utility knife can be handy for cutting through insulation or securing materials.
Specialized Tools
For more complex repairs, consider investing in specialized tools. A multimeter is vital for diagnosing electrical issues, allowing you to measure voltage, current, and resistance within the refrigerator’s circuitry. A refrigerant gauge set is essential for checking and maintaining proper refrigerant levels during compressor or cooling system repairs. Lastly, a torque wrench ensures that screws and bolts are tightened to the manufacturer’s specifications, preventing future leaks or malfunctions.
How to Troubleshoot Cooling Problems in Sub Zero Units
Troubleshooting cooling issues in Sub Zero refrigerators requires a systematic approach to identify and resolve the problem effectively. Follow these steps to ensure optimal performance of your cooling unit.
Step 1: Check the Power Supply
Ensure that the refrigerator is plugged in and receiving power. Check the circuit breaker or fuse to confirm there are no electrical issues. A tripped breaker or blown fuse can lead to cooling problems.
Step 2: Monitor Temperature Settings
Verify that the temperature settings are appropriate. If the thermostat is set too high, the unit may not cool sufficiently. The recommended temperature for refrigerators is around 37°F (3°C) and for freezers it’s 0°F (-18°C).
Step 3: Inspect Door Seals
Examine the door seals for any signs of damage or wear. A faulty seal can allow warm air to enter the refrigerator, affecting its ability to cool properly. Clean the seals regularly and replace them if they are cracked or torn.
Step 4: Check Vents and Airflow
Ensure that the vents inside the refrigerator are not blocked by food items. Proper airflow is crucial for efficient cooling. Clear any obstructions that may prevent cold air from circulating properly.
| Problem | Solution |
|---|---|
| Unit is not cooling | Check power supply and temperature settings. |
| Frost buildup in freezer | Inspect door seals and defrost system. |
| Noisy operation | Examine fan and compressor for issues. |
| Inconsistent temperatures | Check airflow and clean condenser coils. |
Step 5: Clean Condenser Coils
Dust and debris can accumulate on the condenser coils over time, hindering cooling efficiency. Regularly clean these coils, ideally every six months, to maintain optimal performance.
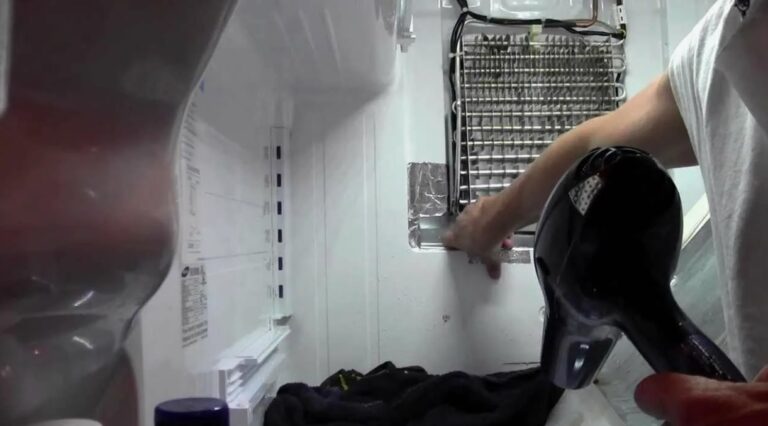
Step 6: Check for Ice Build-Up
Examine the evaporator coils for any ice build-up. Excessive frost can restrict airflow and lead to cooling issues. If ice is present, allow the refrigerator to defrost and investigate the defrost heater operation.
Step 7: Consult a Professional
If after performing these checks the problem persists, it may be time to consult a professional technician who specializes in Sub Zero units. Advanced issues may require expert diagnostics and repairs.
Steps to Fix a Leaking Sub Zero Refrigerator
Fixing a leaking Sub Zero refrigerator requires careful attention to detail to identify and resolve the underlying issues. Follow these steps to address the problem effectively:
1. Identify the Source of the Leak
Before attempting any repairs, it is crucial to determine where the leak originates. Common sources include:
- Damaged door seals
- Clogged defrost drain
- Faulty water supply line
- Condensation buildup
2. Gather Necessary Tools and Materials
To perform the repair, you will need:
- Screwdriver (Phillips and flathead)
- Wrench set
- Replacement seals or parts (if necessary)
- Cleaning materials (cloths, mild detergent)
3. Address Each Source of the Leak
- Inspect and Replace Door Seals: Check the door seals for cracks or damage. If any issues are found, replace the seals to ensure a tight fit.
- Clear the Defrost Drain: Locate the defrost drain inside the refrigerator. Use a mixture of warm water and a mild detergent to clear any obstructions.
- Check the Water Supply Line: Inspect the water supply line for leaks or kinks. Tighten any loose connections or replace damaged sections.
- Manage Condensation: If condensation is excessive, ensure the refrigerator is leveled and the temperature settings are correct to prevent moisture buildup.
4. Test the Refrigerator
Once repairs are made, monitor the refrigerator for any signs of continuing leaks. Place a cloth under the unit to catch any water and check back after a day or two.
5. Seek Professional Help if Needed
If the leak persists after following these steps, or if you are unsure about performing any of the repairs, it’s best to contact a professional technician specializing in Sub Zero appliances for further assistance.
Cleaning and Maintaining the Condenser Coils
The condenser coils of your Sub Zero refrigerator play a critical role in the cooling process by releasing heat absorbed from the interior space. Over time, dust, dirt, and debris can accumulate on these coils, hindering their efficiency and leading to potential system failures. Regular cleaning and maintenance are essential to ensure optimal performance.
To clean the condenser coils effectively, first, ensure that the refrigerator is unplugged to prevent electrical shock. Locate the condenser coils, which are typically found either at the back or beneath the unit. Use a vacuum cleaner with a brush attachment to gently remove loose debris and dust. For stubborn dirt, a soft brush can help dislodge any buildup. Be cautious not to damage the coils while cleaning.
In addition to regular cleaning, it is important to inspect the coils periodically for any signs of wear or damage. If you notice any bent fins or corrosion, consider using a fin comb to straighten the fins or consult a professional for repairs. Maintaining a clearance around the coils is also crucial; ensure that there is adequate space for airflow to facilitate efficient heat exchange.
Cleaning the condenser coils should be performed at least twice a year, or more frequently in dusty environments. Keeping the coils clean not only enhances cooling efficiency but also prolongs the life of your refrigerator. By following these simple maintenance steps, you can ensure that your Sub Zero refrigerator operates at peak performance.
Replacing the Door Seals on Sub Zero Refrigerators
Door seals are essential components of Sub Zero refrigerators, ensuring that the cooling system operates efficiently. Over time, these seals can wear out, allowing cold air to escape and leading to increased energy consumption and inconsistent temperatures.
Here are the steps to effectively replace the door seals:
- Identify the Need for Replacement:Inspect the seals for signs of wear, such as cracks, tears, or loss of elasticity. Conduct a simple test by closing the door on a piece of paper; if you can easily pull it out, the seal may need replacing.
- Purchase Replacement Seals:Order the specific seals for your Sub Zero model. It is crucial to select genuine parts to maintain the integrity and performance of your refrigerator.
- Remove the Old Seals:Gently peel the old seal from the door. Take care not to damage the door frame during removal. If necessary, use a putty knife to assist in loosening the seal from adhesive residue.
- Prepare the Door Surface:Clean the door frame thoroughly to remove any dirt or adhesive remnants. A clean surface ensures proper adhesion for the new seal.
- Install the New Seals:Align the new seal with the door frame and press it into place. Ensure the seal is evenly seated and follows the contours of the door without gaps.
- Check the Seal Integrity:Once the new seal is installed, conduct the paper test again to ensure it is securely in place. Additionally, observe for any air leaks over the following days.
Regular maintenance of door seals enhances energy efficiency and preserves food quality. Consider checking seals every six months as part of your refrigerator upkeep routine.
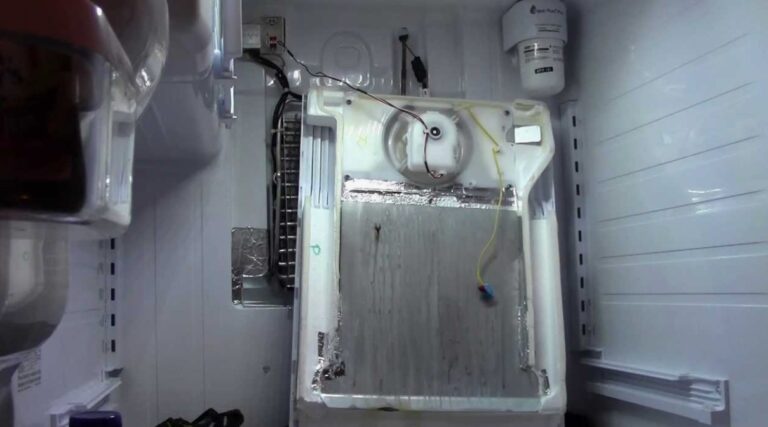
Understanding the Defrost System in Sub Zero Models
The defrost system in Sub Zero refrigerators plays a crucial role in maintaining optimal temperature and efficiency. This system prevents the build-up of frost on the evaporator coils, which can hinder the performance of the cooling system. Understanding the components and function of the defrost system is essential for effective maintenance and repair.
Typically, the defrost system in Sub Zero models consists of three main components: the defrost timer, the defrost heater, and the defrost thermostat. Each of these parts works together to ensure that ice accumulation is controlled and that the refrigerator operates seamlessly.
| Component | Function |
|---|---|
| Defrost Timer | Regulates the timing of the defrost cycle, triggering the heater at regular intervals. |
| Defrost Heater | Melts accumulated frost on the evaporator coils to restore optimal airflow. |
| Defrost Thermostat | Monitors the temperature of the evaporator coils, ensuring the heater operates only when necessary. |
The defrost cycle is typically initiated at regular intervals, typically ranging from 8 to 12 hours, depending on usage and environmental conditions. During this cycle, the defrost heater activates, raising the temperature of the evaporator coils to remove ice buildup. The thermostat helps prevent overheating by shutting off the heater when the coils reach a specific temperature.
Regular maintenance of the defrost system is vital to prevent unexpected failures. Common issues include a malfunctioning timer, which may lead to excessive frost buildup, or a defective heater, which can prevent the defrost cycle from occurring altogether. Users should also be aware of the signs of an ineffective defrost system, such as unusual temperatures or visible frost accumulation inside the refrigerator.
For troubleshooting or repairs, consulting a professional familiar with Sub Zero refrigerators is recommended. Ensuring the defrost system functions correctly is essential for the longevity and efficiency of these premium cooling systems.
When to Call a Technician for Complex Repairs
Determining when to seek professional assistance for a Sub Zero refrigerator can save you time and prevent further damage. If you notice persistent issues such as inconsistent temperatures, unusual noises, or excessive frost buildup, these may indicate underlying problems. Refrigerators rely on intricate systems like compressors, condensers, and evaporators, which require expert knowledge for proper diagnosis and repair.
Another key sign that it’s time to call a technician is when the appliance fails to cool or freeze food as expected. This could result from a malfunctioning thermostat or a refrigerant leak, both of which can be challenging to identify without specialized tools. Additionally, if your refrigerator shows signs of electrical failures, such as tripped circuit breakers or burnt-out lights, these issues need skilled intervention to ensure safety and functionality.
If you experience frequent temperature fluctuations or notice error codes on the display, professional inspection is essential. These symptoms often indicate a complex issue that DIY fixes cannot resolve. Furthermore, if your refrigerator is older or has undergone recent repairs, consulting a technician may provide insights on whether the appliance is worth repairing or if a replacement is necessary.
Relying on a qualified technician ensures that repairs are conducted using proper techniques and genuine parts, which is crucial for preserving the performance and longevity of your Sub Zero refrigerator. When in doubt, it’s always better to err on the side of caution and call an expert to avoid costly mistakes and ensure that your cooling system operates efficiently.
Cost of Repairs for Sub Zero Refrigerators: What to Expect
When it comes to maintaining a Sub Zero refrigerator, understanding the potential costs of repairs is crucial for any owner. These premium cooling systems are known for their durability and efficiency, but like any appliance, they may require maintenance or repairs over time. Estimating the cost can vary widely based on the type of issue and whether replacement parts are needed.
Common Repair Costs
Minor repairs, such as replacing a faulty thermostat or fixing a door seal, typically range from $150 to $400. More significant issues, such as compressor failures or refrigerant leaks, can escalate to between $500 and $1,200. It’s important to note that labor costs can also add up, often between $100 and $200 per hour, depending on the technician’s expertise and location.
Factors Influencing Repair Costs
Several factors can influence the overall expense of repairing a Sub Zero refrigerator. The age of the unit plays a role; older models may require specialized parts that are harder to find, thereby increasing costs. Additionally, the complexity of the issue affects the price–more intricate repairs involving electrical systems typically incur higher labor charges. Lastly, the reputation and certification of the repair service can also impact pricing, with authorized Sub Zero technicians often commanding a premium for their expertise.
Warranty Considerations for Your Sub Zero Refrigerator
Understanding the warranty for your Sub Zero refrigerator is crucial to ensure your investment is protected. Here are key considerations to keep in mind:
- Duration: Sub Zero refrigerators typically come with a limited warranty that lasts from 2 to 12 years, depending on the specific component. Check your purchase details to confirm your coverage.
- Coverage: The warranty usually covers defects in materials and workmanship. It is essential to read the terms to understand what is included, especially regarding parts like compressors and sealed systems.
- Exclusions: Common exclusions include damages caused by improper installation, misuse, or natural disasters. Familiarize yourself with these exclusions to avoid unexpected costs.
- Transferability: If you sell your home, the warranty may be transferable to the new owner, which can enhance the value of your property. Verify the transfer process with Sub Zero’s customer service.
- Service Requirements: Sub Zero typically requires that repairs are conducted by authorized service technicians. Failing to comply may void your warranty, so ensure you follow the guidelines provided.
- Documentation: Retain all receipts and warranty documentation. This paperwork will be essential if you need to file a claim or prove the warranty status.
By understanding these warranty considerations, you can ensure that you fully benefit from your Sub Zero refrigerator’s protection plan and maintain its premium performance for years to come.
Q&A – Sub Zero refrigerator repair:
What are the common issues that require Sub Zero refrigerator repair?
Common issues with Sub Zero refrigerators that may require repair include temperature fluctuations, unusual noises, water leakage, ice buildup in the freezer, and malfunctioning control panels. Each of these problems can affect the overall performance and lifespan of the appliance. For instance, if your fridge is not keeping food adequately chilled, it may indicate a problem with the condenser or evaporator coils. It’s advisable to address these issues quickly to prevent further damage.
How can I tell if my Sub Zero refrigerator needs a professional repair?
Signs that your Sub Zero refrigerator may need professional repair include persistent beeping sounds, an unusual rise in temperature, or the presence of frost in areas where it shouldn’t be. If you notice that the door seal is damaged or if the lights inside are not functioning, these are additional signs that professional attention is required. Timely intervention can save you from costly replacements in the future.
What should I expect during a Sub Zero refrigerator repair service?
During a Sub Zero refrigerator repair service, a technician will first conduct a diagnostic assessment to identify the issue. This may involve checking the electrical components, cooling systems, and seals. Once the problem is identified, the technician will explain the necessary repairs and provide an estimate before proceeding. Repairs can vary in duration based on the complexity of the issue, but most problems can be resolved in a single visit if parts are readily available.
How do I maintain my Sub Zero refrigerator to prevent future repairs?
To maintain your Sub Zero refrigerator and reduce the likelihood of future repairs, it’s recommended to clean the condenser coils regularly, ensure door seals are airtight, and routinely check the temperature settings. Additionally, avoid overloading the shelves, as this can impede airflow and strain the cooling system. Regularly inspecting the drainage system for blockages can also help keep the appliance in good working condition.
Are there any warranties available for Sub Zero refrigerator repairs?
Yes, many Sub Zero refrigerator repairs come with warranties that cover parts and labor for a specified period. The details of these warranties can vary based on the repair service provider and the type of repair performed. It’s advisable to ask the technician about warranty options before the repairs begin, as this can give you peace of mind regarding the quality and longevity of the work performed.
What are the common issues faced with Sub Zero refrigerators that might require repair?
Sub Zero refrigerators can experience various problems, such as temperature inconsistencies, strange noises, water leaks, and issues with the ice maker. Temperature inconsistencies may arise from faulty thermostats or blocked vents. Strange noises could indicate a problem with the compressor or fans. Water leaks may be due to clogged drainage systems or worn door seals. If you notice any of these issues, it’s advisable to consult a professional repair service specializing in Sub Zero appliances to ensure proper diagnosis and repair.
How do I find a reliable service for Sub Zero refrigerator repair?
Finding a trustworthy repair service for your Sub Zero refrigerator involves a few steps. Firstly, check for authorized service providers listed on the official Sub Zero website, as they are trained specifically for these units. You can also look for customer reviews and ratings online to gauge the reliability of local repair companies. Asking friends or family for recommendations can be helpful as well. It’s important to choose a service that offers warranties on repairs and has experience dealing with high-end cooling systems, as Sub Zero refrigerators often require specialized knowledge and skills.
Our Practical Experience: Real Cases in the Field of Sub Zero refrigerator repair
At APPLIANCE REPAIR EXPERT, we recognize that Sub Zero refrigerator repair demands a level of precision far beyond standard appliances due to their unique dual-compressor architecture. We recently handled a case in a high-end North York residence where a Pro 48 model suffered from a “silent” vacuum leak in the secondary evaporator loop—a nuance that often leads to compressor burnout if misdiagnosed. Our engineers used ultrasonic leak detectors to pinpoint the failure and performed a specialized silver-solder braze on the copper-to-aluminum transition joints. We don’t just clear errors; we analyze the duty cycle of each hermetic compressor to ensure the system maintains the exact “thermal lag” required to keep luxury preservation standards without taxing the inverter boards.
Expert Recommendations from APPLIANCE REPAIR EXPERT on Sub Zero refrigerator repair
-
Condenser Micro-Cleaning: To avoid the most common cause of Sub Zero refrigerator repair, clean the top-mounted condenser every 4–6 months; even a 1 mm layer of dust on the high-density fins can raise the discharge temperature above 105°F, causing the CPU to trigger a “Service” icon.
-
Door Cam and Hinge Tension: Periodically inspect the 90-degree door stop and the closing cams. If the door requires more than 5 lbs of force to break the vacuum seal, the cam may be worn (part #7010397), which prevents the magnetic gasket from reaching full 100% “adhesion,” leading to frost on the evaporator.
-
Water Filter Bypass Logic: When replacing the 4204490 or Push-In style filters, ensure the “Filter” indicator is reset via the control panel; if the microprocessor detects a pressure drop of more than 15 PSI across the filter head, it will disable the icemaker to prevent solenoid damage.
-
Dual Evaporator Descaling: In areas with high mineral content, we recommend a descaling of the drain troughs during any Sub Zero refrigerator repair. Use a 10% citric acid solution to ensure the drain tube remains free of “slime” that can back up and freeze the primary evaporator fan.
-
Voltage Sensitivity Protection: Sub-Zero control boards (especially on the 600 and 700 series) are sensitive to “dirty” power. We recommend installing a dedicated surge protector with a response time of less than 1 nanosecond to protect the microprocessor from the voltage transients common in high-density residential zones.
Choose APPLIANCE REPAIR in San Jose for you today and get fast, dependable service from technicians who truly care about your comfort — schedule your appointment now and restore your home’s convenience in no time.